As the year draws to a close, millions around the world eagerly await Christmas—a season of sparkling lights, festive music, delicious treats, and cherished traditions. At the heart of this celebration is the Christmas tree, an evergreen symbol of life and joy, decorated with lights, ornaments, sweets, and stars.
The tradition of Christmas trees dates back to 16th-century Germany, with early records from 1539 in Strasbourg and 1576 in Alsace showing illuminated trees in private homes. By the 1800s, the custom reached Britain through Queen Charlotte and became widely popular after Queen Victoria and Prince Albert introduced the tradition to the royal family in 1841. Over time, Christmas trees spread across Europe and North America, becoming a central part of holiday celebrations.
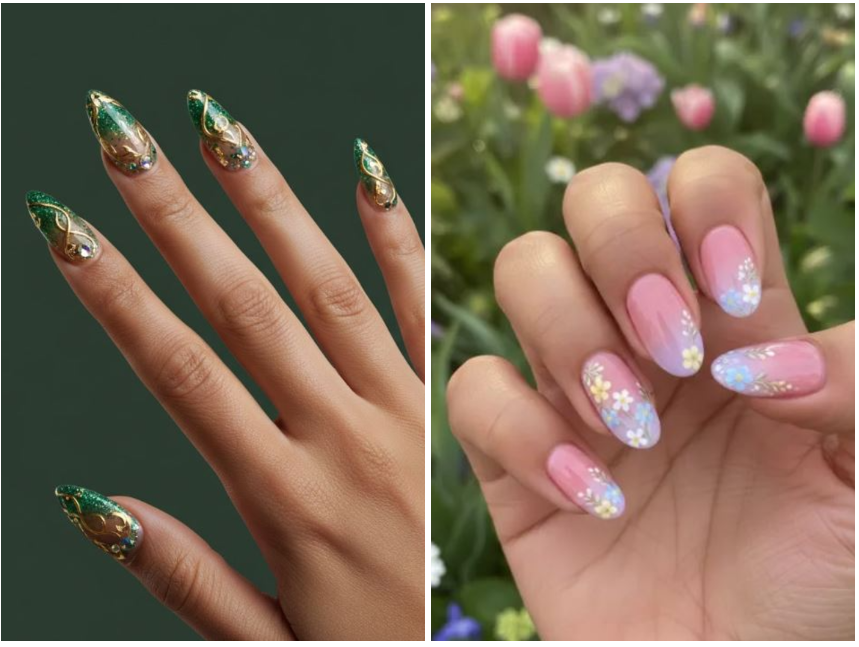
This festive tradition now inspires a whole new way to celebrate: Christmas tree nail designs. From delicate ornaments to glittering lights, these nail designs let you carry the joy of the season wherever you go, making your fingertips a miniature celebration of this centuries-old holiday tradition.
II. What Are Christmas Tree Nails?
Christmas tree nails refer to any nail art design that incorporates Christmas tree motifs as the primary or accent design element. These designs range from literal interpretations of decorated evergreens to abstract, modern takes on the classic symbol.
Variations include:
- Accent Nails: One or two nails feature detailed trees while others have complementary designs
- Full Sets: Every nail displays a complete Christmas tree scene
- Minimalist Approaches: Tiny trees on neutral backgrounds
- Maximalist Displays: Entire winter landscapes across all nails
If cute seasonal art excites you, these 10 merry red-and-white holiday nail looks are waiting for you — check them out!
Popular Placements:
- Ring finger as the traditional accent nail
- Thumb nail for maximum visibility
- Alternating trees and solid colors
- Different tree designs on each nail for a “Christmas tree farm” effect
III. Essential Tools & Materials
Gather these supplies before you begin your festive manicure:
Basic Essentials:
- Base coat and quick-dry top coat
- Nail polishes: Forest green, crimson red, gold, silver, white, and navy
- Nail polish remover and cleanup brush
- Cotton pads and orangewood sticks
Nail Art Tools:
- Detail brushes (thin liner brush is crucial)
- Dotting tools (multiple sizes)
- Striper brush for straight lines
- Makeup sponge for gradient effects
Embellishments:
- Loose glitter (gold, silver, holographic)
- Rhinestones and microbeads
- Nail charms (miniature ornaments, stars)
- Stripping tape for precise lines
- Foil transfer sheets for metallic effects
Alternatives for Beginners:
- Christmas-themed nail stickers/decals
- Nail stamping plates with tree designs
- Water slide transfers
- Pre-made 3D nail charms
IV. Techniques Used in Christmas Tree Nails
Freehand Painting:
- Start with triangular shapes and build layers
- Use a dotting tool for “ornaments”
- Create branches with quick, upward strokes
Stamping:
- Choose plates with Christmas tree designs
- Apply polish to the design, scrape excess, and transfer with a stamper
- Perfect for symmetrical, intricate patterns
Sticker Application:
- Apply to dry polish
- Seal with thick top coat
- Great for consistent designs across multiple nails
3D Effects:
- Apply rhinestones with tweezers while polish is tacky
- Use nail glue for heavier charms
- Create texture with flocking powder or textured polish
Background Techniques:
- Ombre: Blend two colors with a sponge
- Glitter gradient: Concentrate glitter at cuticle or tip
- Marble: Swirl colors with a toothpick or thin brush
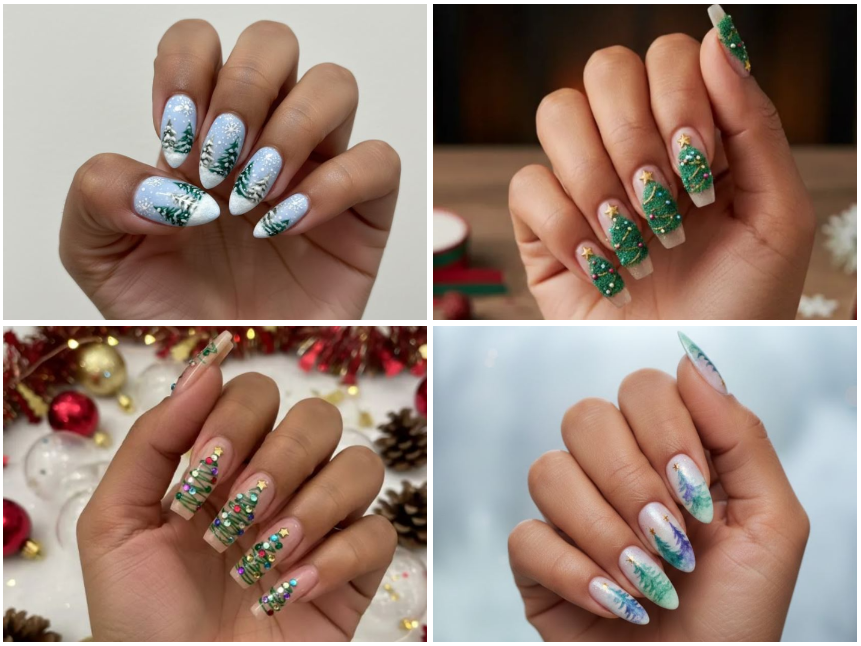
V. 15 Festive Christmas Tree Nail Designs
1. Classic Green Silhouette
Difficulty: Beginner
Simple yet elegant, this design features outlined Christmas trees on a solid background. Use a thin brush to create triangle shapes with “V” strokes for branches. Perfect for short nails and minimalists.
Key Elements: Black or dark green outlines, solid fill or hollow centers, star topper optional.
If statement nails excite you, these 15 elongated Christmas-inspired nail designs will instantly level up your look.
2. Glittering Starry Night Trees

Difficulty: Intermediate
Create a deep navy or black background dotted with white “stars” (tiny dots). Silhouette trees in black or dark green stand against this sparkling night sky. Add holographic glitter for magical shimmer.
Key Elements: Dark background, white star dots, glitter topcoat, silhouette trees.
3. Minimalist Negative Space Tree
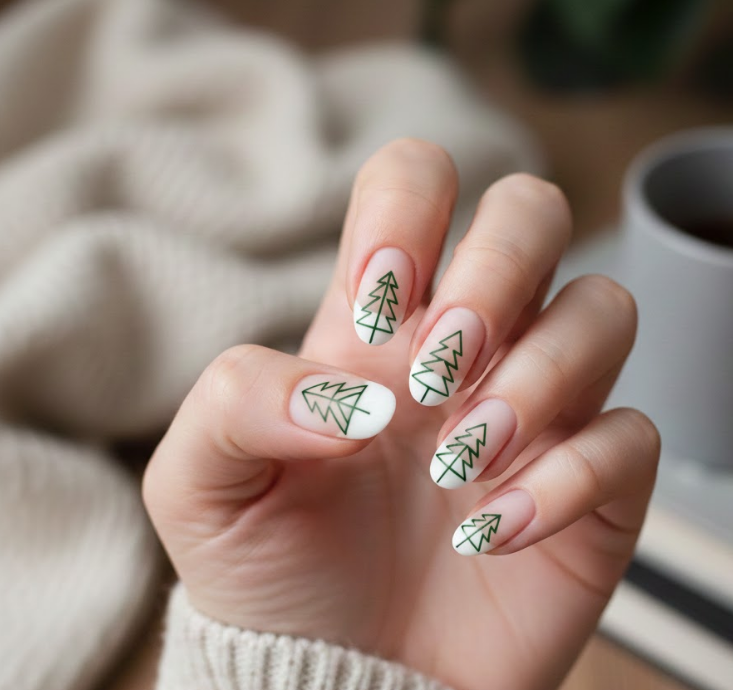
Difficulty: Beginner to Intermediate
Modern and chic, this design uses your natural nail as part of the artwork. Paint only the tree outline, leaving the center transparent. Alternatively, create a tree shape using tape for sharp, geometric lines.
Key Elements: Clean lines, neutral background, geometric precision.
If timeless festive tones excite you, these 15 candy-cane inspired nail styles will give instant Christmas vibes.
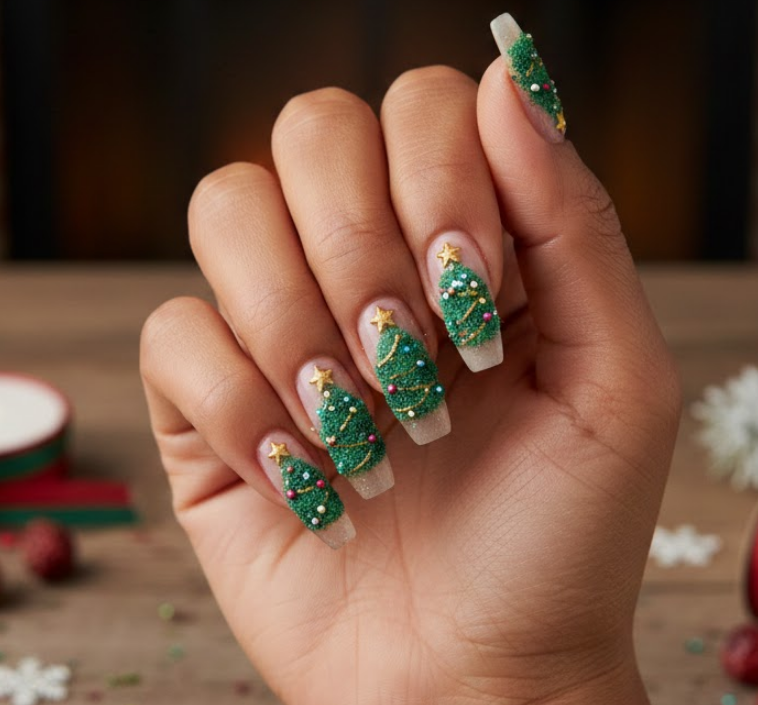
4. Rhinestone-Ornamented Tree
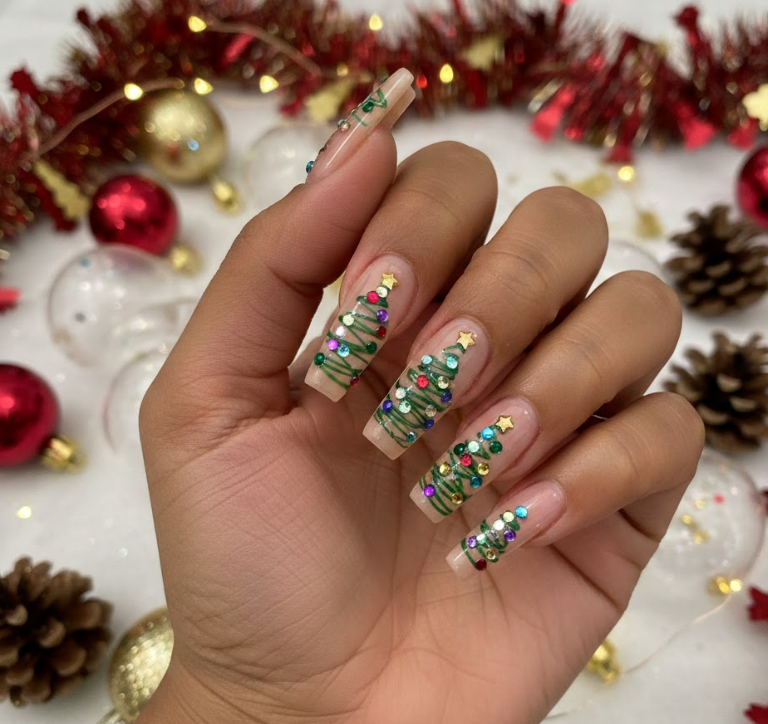
Difficulty: Intermediate
After painting a classic tree, decorate with tiny rhinestones as ornaments. Use different colors for variety. Perfect for holiday parties and adding bling to your festive look.
Key Elements: Colorful rhinestones, tweezers for placement, thick top coat to secure.
5. Cartoon Whimsical Trees
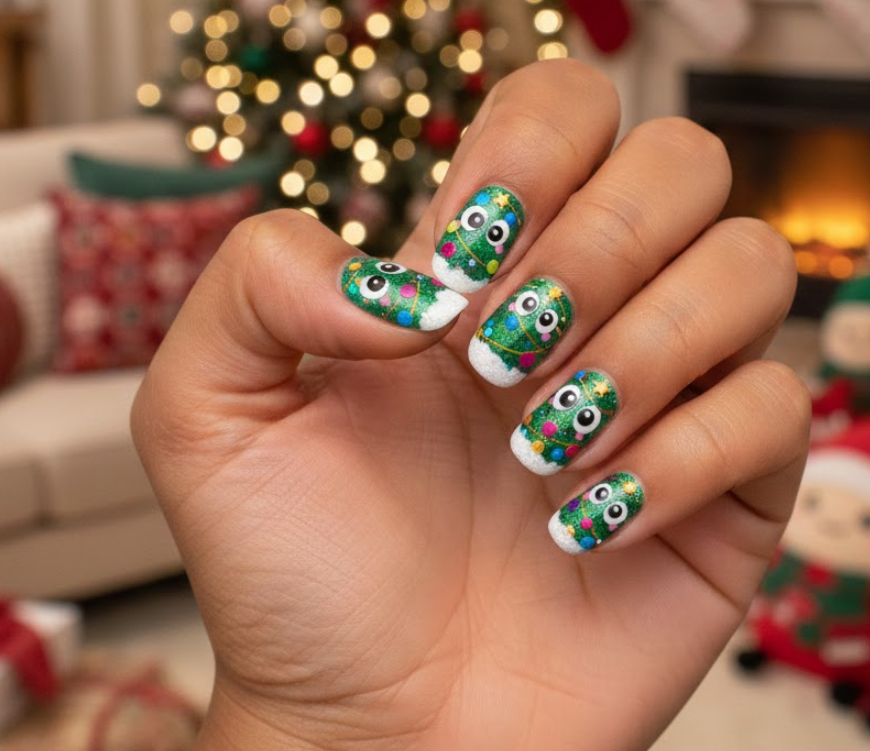
Difficulty: Beginner
Playful and colorful, these trees feature exaggerated proportions and smiling faces. Think cartoon characteristics with googly eyes, rosy cheeks, and disproportionate ornaments.
Key Elements: Black outlines, bright colors, expressive features.
If traditional Christmas colors make you smile, these 30 festive red-green manicure ideas are waiting for you.
6. Snowy Winter Scene
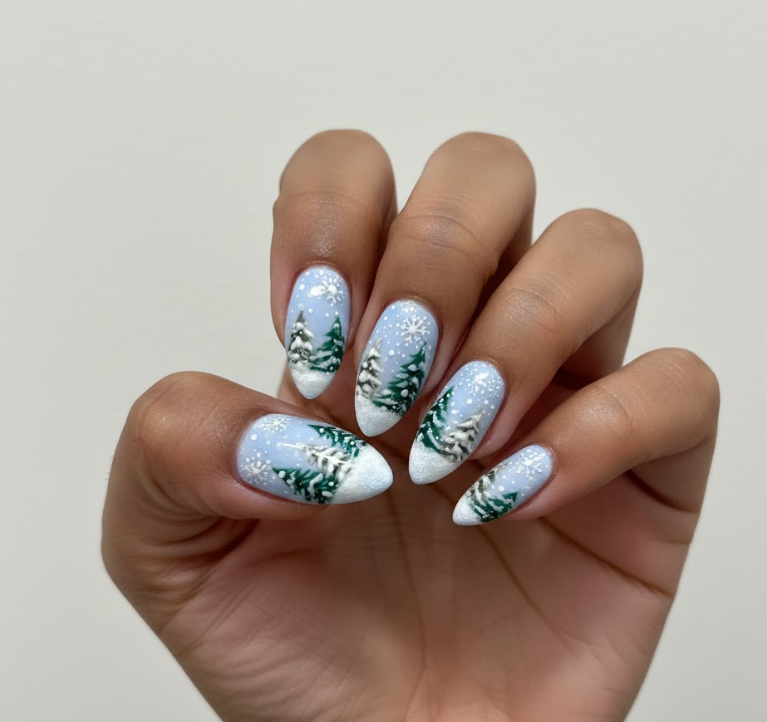
Difficulty: Intermediate
Create a full winter landscape with snow-capped trees. Use a white polish or acrylic paint to add “snow” on tree branches. Background can include falling snowflakes or a snowy ground line.
Key Elements: Snow accents, wintery color palette, textured snow effects.
7. Plaid & Trees Combo
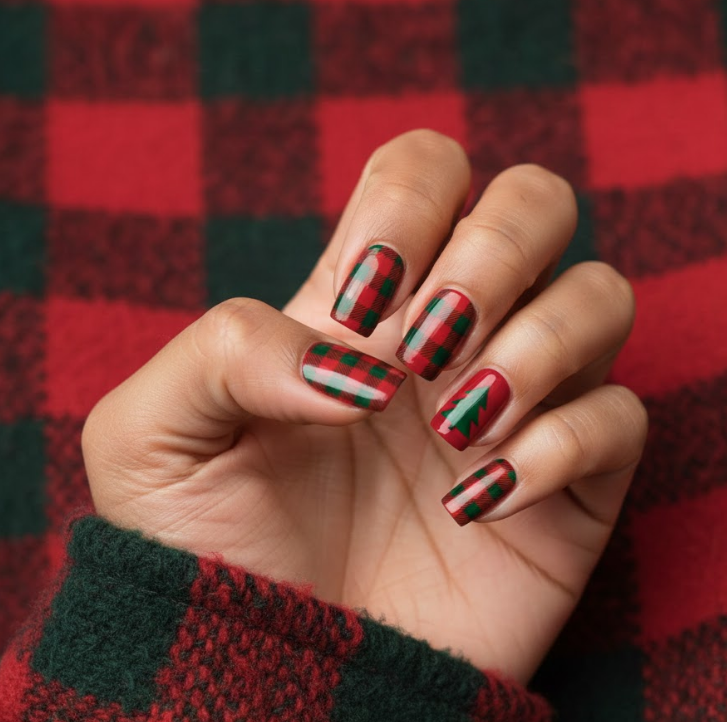
Difficulty: Advanced
Combine two classic patterns by painting buffalo check plaid on some nails and Christmas trees on others. Coordinate colors—red and green plaid with matching trees creates cohesion.
Key Elements: Precise lines, color coordination, and striping tape for clean plaid.
If cute seasonal details excite you, these 15 Christmas-themed toe nail looks will wow at every gathering.
8. Ombre Sky Background Trees

Difficulty: Intermediate
Create a stunning sunset or twilight sky using an ombre sponge technique (purple to pink, blue to purple). Paint black silhouette trees against this gradient background for dramatic effect.
Key Elements: Smooth gradient transition, silhouette contrast, sponge blending.
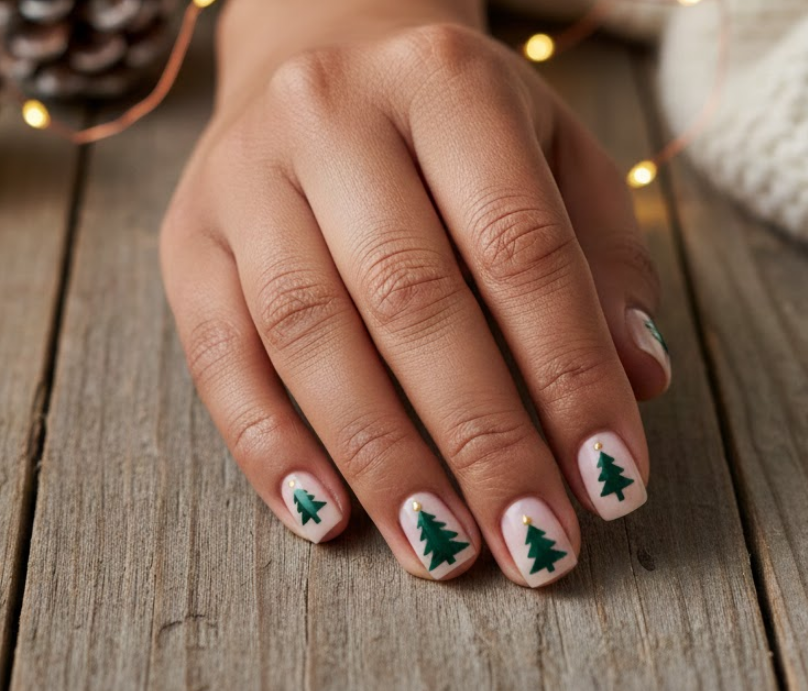
9. French Tip Christmas Trees
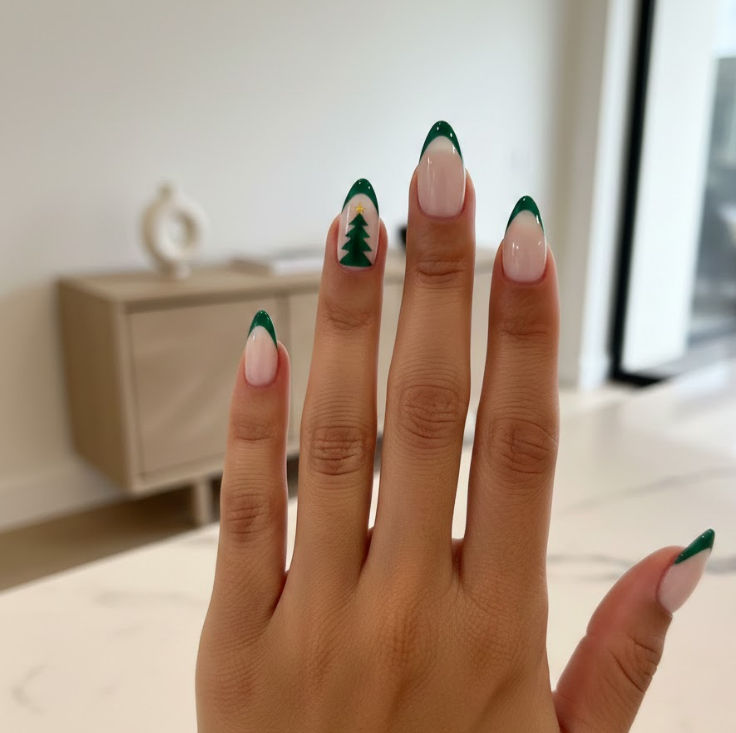
Difficulty: Beginner
Put a holiday twist on the classic French manicure. Instead of white tips, create green tree shapes at the tips of your nails. Simple yet unmistakably festive.
Key Elements: Neutral base, tree-shaped tips, clean smile lines.
If playful shimmer makes you happy, these 25 glowing Christmas-inspired nail styles are waiting for you.
10. Charms & 3D Decorations
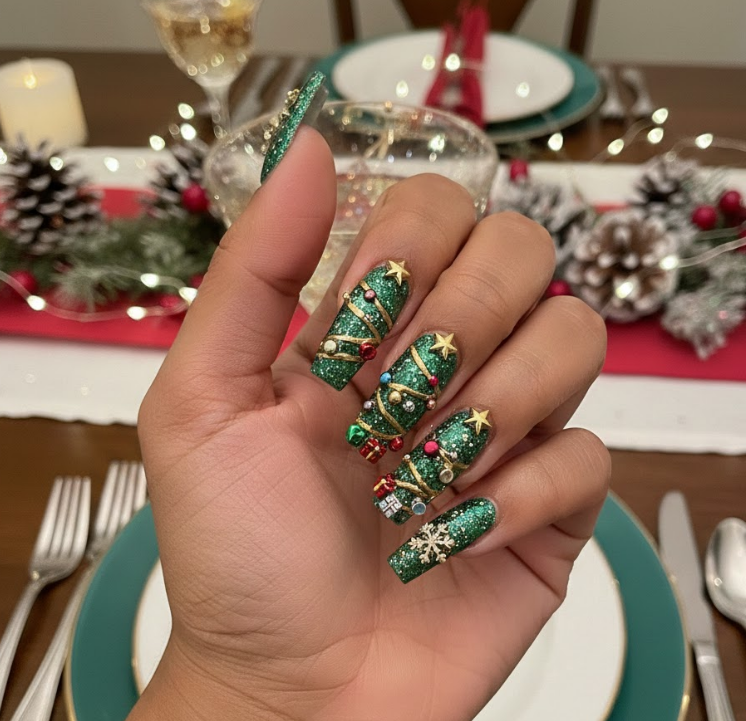
Difficulty: Intermediate to Advanced
Take dimension to the next level with small nail charms—tiny presents, stars, or actual miniature ornaments. Arrange around a painted tree or use as tree toppers.
Key Elements: Nail glue, small charms, balanced placement.
11. Abstract Geometric Trees
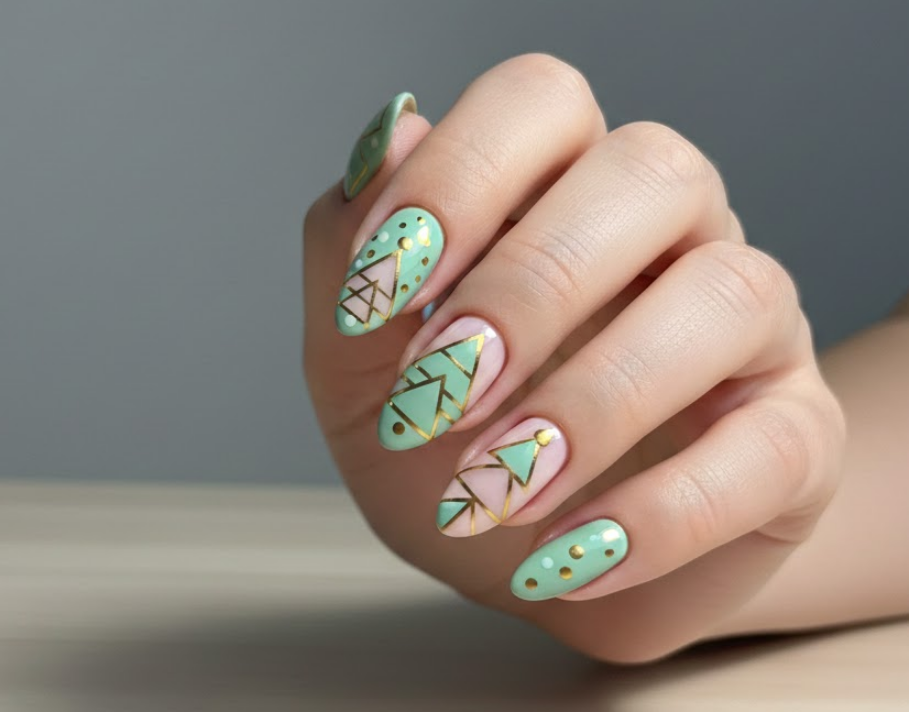
Difficulty: Intermediate
Modern art interpretation using triangles, lines, and dots to suggest rather than depict trees. Use unexpected color combinations like mint and gold or blush and silver.
Key Elements: Geometric shapes, contemporary color palette, negative space.
If cool festive shades excite you, these 25 sapphire-and-ice inspired Christmas nails are a must-see.
12. Flocked (Textured) Trees
Difficulty: Intermediate
Create a velvety, fuzzy texture using flocking powder. Paint tree shapes with clear or colored polish, immediately sprinkle with powder, and tap off excess. Surprising tactile element!
Key Elements: Flocking powder, quick application, matte finish.
13. Tiny Forest
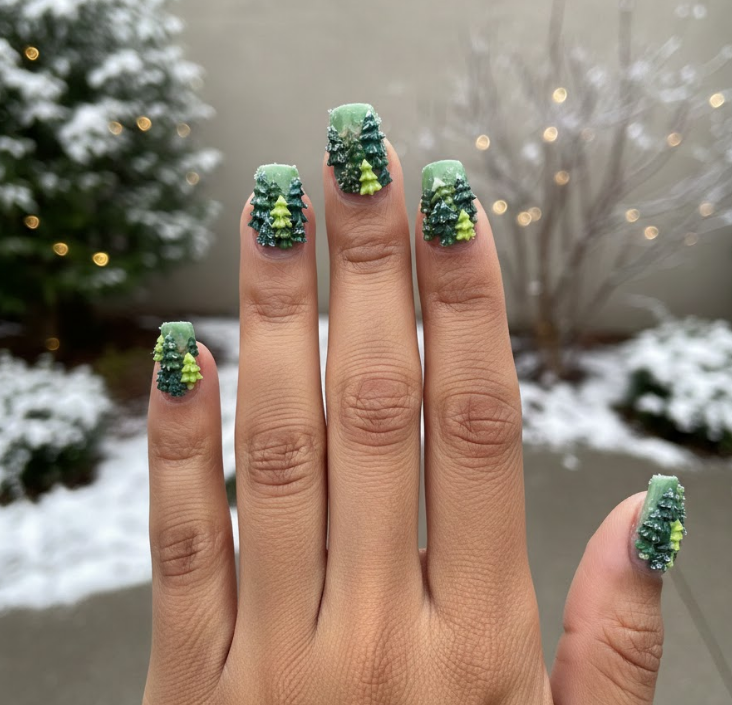
Difficulty: Beginner
Instead of one large tree per nail, create clusters of tiny trees. Vary heights and greens for depth. Particularly charming on shorter nails where space is limited.
Key Elements: Multiple small trees, varied heights, simple shapes.
14. Watercolor Christmas Trees

Difficulty: Advanced
Soft, blended, artistic effect achieved by applying watered-down polish or using actual watercolor paints (with proper nail preparation). Dreamy and ethereal holiday look.
Key Elements: Soft edges, blended colors, artistic expression.
If elegant Christmas glam is your style, these 15 metallic-gold and forest-green nail looks will shine all season.
15. Christmas Tree Farm Set
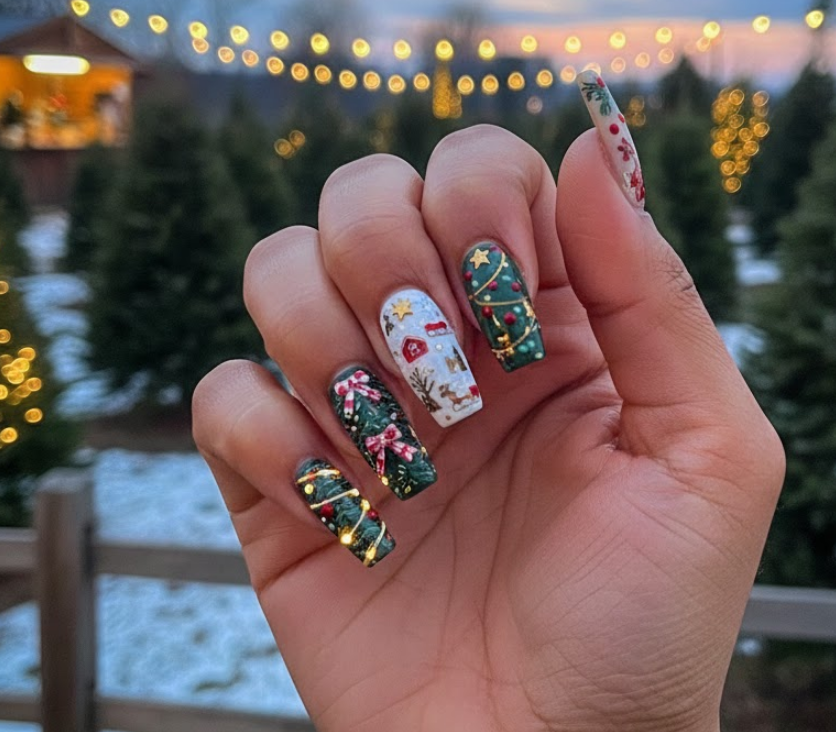
Difficulty: Intermediate
Each nail features a different style of Christmas tree—from perfectly symmetrical to Charlie Brown sparse. Tie together with consistent background colors or framing.
Key Elements: Variety within unity, creative interpretation, storytelling across nails.
VI. Step-by-Step Tutorial: Classic Silhouette Design (Beginner-Friendly)
Step 1: Preparation
- Remove old polish, shape nails, push back cuticles
- Apply a clear base coat to protect nails and create smooth surface
Step 2: Base Color
- Apply two thin coats of your chosen background color (classic options: red, navy, white, or nude)
- Allow to dry completely between coats
Step 3: Tree Outline
- Using a thin liner brush and dark green polish, draw a triangle starting from the base of your nail
- Keep the triangle centered with equal space on both sides
- The height should be about 2/3 of your nail length
Step 4: Add Trunk
- At the base of the triangle, add a small rectangle in brown
- This should be about 1/5 the width of the tree base
Step 5: Create Branches
- While the green is still slightly tacky, use the same brush to create small “V” shapes along the edges of the triangle
- Start with larger “V”s at the bottom, getting progressively smaller toward the top
- Don’t worry about perfection—natural variation looks more organic
Step 6: Star Topper
- Using a dotting tool or toothpick, place a small yellow star at the tree’s peak
- Alternatively, use a tiny rhinestone or draw a simple star shape
Step 7: Finishing Touches
- Allow design to dry completely (at least 10 minutes)
- Apply a generous layer of quick-dry top coat, sealing the edges
- Clean up any mistakes around cuticles with a small brush dipped in polish remover
Common Mistakes & Solutions:
- Smudging: Always allow each layer to dry before proceeding
- Uneven lines: Rest your painting hand on a stable surface
- Thick polish: Wipe excess polish from brush before painting
- Running out of space: Plan your design before starting; sketch with pencil if needed
VII. Pro Tips for Long-Lasting Holiday Nails
Prep Work is Crucial:
- Dehydrate nail plate with alcohol or primer before base coat
- Buff nails lightly to remove shine and create texture for polish to adhere
- Always apply polish to completely dry, oil-free nails
Layering Techniques:
- Thin coats dry faster and last longer than thick ones
- Cap the free edge of your nail with each layer to prevent chipping
- Allow each coat to dry 90% before applying the next
Sealing Embellishments:
- For rhinestones and charms: apply top coat, place decoration, then apply another layer of top coat
- For glitter: use the “dab” method—apply top coat, dab glitter, seal with another top coat
- For 3D elements: consider gel top coat for extra security
Quick Dry Methods:
- Invest in a quick-dry top coat
- Dip nails in ice water for 2-3 minutes after painting
- Use quick-dry drops or spray
- Avoid using hands for at least 30 minutes after painting
VIII. Removal & Aftercare
Safely Removing Glitter & Gems:
- Foil Method: Soak cotton pad in acetone, place on nail, wrap with aluminum foil for 10-15 minutes
- Gently push off softened polish with orangewood stick
- For stubborn glitter, gently buff remaining particles
- Never peel or force off polish
Nail Care Post-Removal:
- Wash hands thoroughly to remove acetone residue
- Apply cuticle oil generously
- Use a nourishing hand cream
- Consider a “nail holiday” with just strengthener between elaborate designs
Preventing Damage:
- Always use a base coat to prevent staining
- Don’t use nails as tools (especially during gift-opening!)
- Wear gloves for cleaning and dishwashing
- Reapply top coat every 2-3 days to refresh shine and protection
IX. Inspiration & Customization Ideas
Match Your Home Decor:
- Traditional red and green for classic homes
- Frosted silver and blue for winter wonderland themes
- Rustic burlap and wood tones for farmhouse Christmas
- Pastels for trendy “holiday latte” aesthetics
Coordinate with Outfits:
- Match your nail art to your favorite holiday sweater
- Complement your Little Black Dress with gold-accented trees
- Coordinate with seasonal jewelry (emerald greens, ruby reds)
- Consider your party schedule—more subtle designs for work, bolder for parties
Incorporate Personal Style:
- Minimalist: Single tiny tree on nude background
- Glam: All-over glitter with crystal ornaments
- Boho: Mismatched trees across nails with natural elements
- Retro: 60s-inspired mod trees with geometric patterns
- Gothic: Black trees on deep red with silver accents
X. Conclusion
Christmas tree nails offer endless possibilities for festive self-expression. Whether you’re a nail art novice or an experienced manicurist, there’s a design that fits your skill level and style. Remember that perfection isn’t the goal—joy and creativity are what make holiday nail art special. Don’t be afraid to experiment, mix techniques, or create your own unique tree variations. Your nails are tiny canvases waiting to tell your holiday story.
Share your creations online with popular hashtags like #ChristmasTreeNails, #HolidayNailArt, and #FestiveFingers to join the global community of nail art enthusiasts celebrating the season. However you choose to decorate your digits, may they bring you cheer every time you glance at your hands this holiday season!
XI. FAQ Section
Q: How long do Christmas tree nails take?
A: It varies by design complexity. Simple designs: 30-45 minutes. Intricate designs with embellishments: 1.5-2 hours. Always add drying time between steps.
Q: Can I do these on short nails?
A: Absolutely! In fact, many designs (like tiny forests or minimalist trees) work beautifully on shorter nails. Scale down the design elements proportionally.
Q: What if I’m not good at freehand painting?
A: Numerous alternatives exist: nail stickers, stamping plates, water slide decals, or using a toothpick to create dot trees. Practice on paper first, and remember—even “imperfect” trees have charm!
Q: How do I make my nail art last through holiday parties?
A: Proper preparation is key. Use a quality base and top coat, cap the edges, avoid water exposure before fully cured, and carry a small top coat for touch-ups. Consider gel polish for ultimate longevity.
Q: Can I do Christmas tree nails with gel polish?
A: Yes! The techniques are similar, but you’ll need a UV/LED lamp to cure each layer. The benefit is longer wear and more working time before polish dries.
Q: How far in advance should I do my holiday nails?
A: For regular polish, 1-2 days before events. For gel, up to a week. Consider doing a practice run if trying a new technique.
Q: What’s the easiest Christmas nail design for complete beginners?
A: The “Classic Green Silhouette” or using Christmas tree stickers. Dot trees (using a dotting tool to create triangular dot formations) are also very beginner-friendly.
Q: How do I remove nail art without damaging my nails?
A: Always soak, don’t scrape. Use the foil method with acetone, and follow with nourishing oils and creams. Never peel off polish.
May your holiday season be merry, bright, and beautifully manicured!