Today, Santa Claus is depicted as a jolly, plump, white-bearded man in a red suit with white fur trim. He lives at the North Pole with his wife, Mrs. Claus, a workshop full of elves who make toys, and a team of flying reindeer led by Rudolph. On Christmas Eve, he delivers gifts to children around the world, traveling in a sleigh pulled by his reindeer, entering homes by going down the chimney, and leaving presents under the Christmas tree or in stockings hung by the fireplace. He’s known for his hearty laugh: “Ho, Ho, Ho!”
This iconic imagery isn’t just for stories and stockings—it’s a vibrant source of inspiration for festive beauty and self-expression. This season, you can channel that merry magic directly onto your fingertips with Santa Claus Nail Art. From simple, cheerful accents to full-blown winter wonderlands, this guide will walk you through everything you need to create your own festive manicure.
10 Festive Santa Claus Nail Designs
1. Classic Santa Face Accent
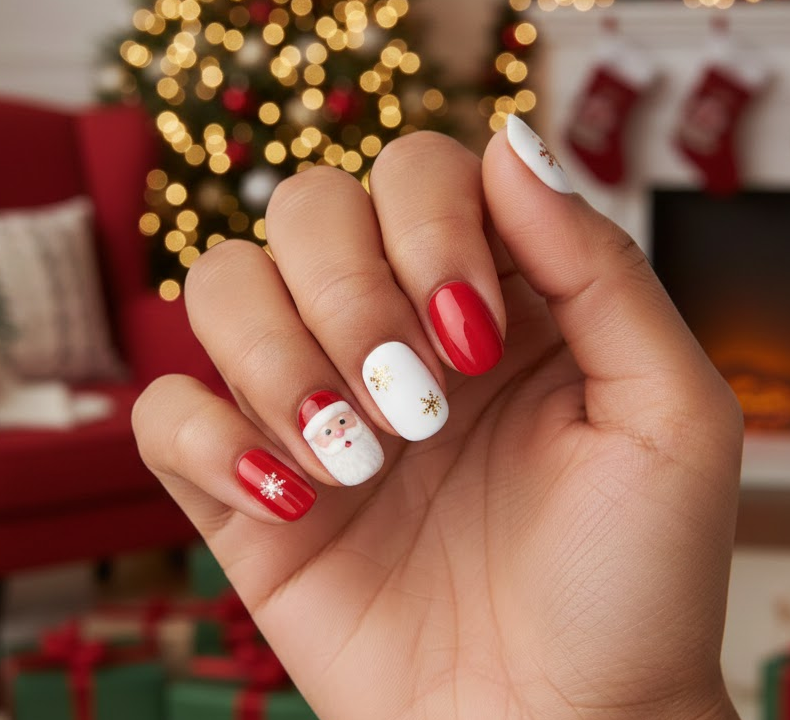
Spread instant cheer by painting a jolly Santa face on your ring finger! Dot on his eyes and nose, swirl on his fluffy beard and mustache, and crown it with his red hat and white pompom. The rest of your nails shine in simple, merry red or white—a perfect pop of personality that’s incredibly fun to create.
If you love playful holiday details, these 15 red-and-white festive cap-inspired nail styles are perfect for you — they instantly steal attention.
2. Cozy Cable Knit & Santa
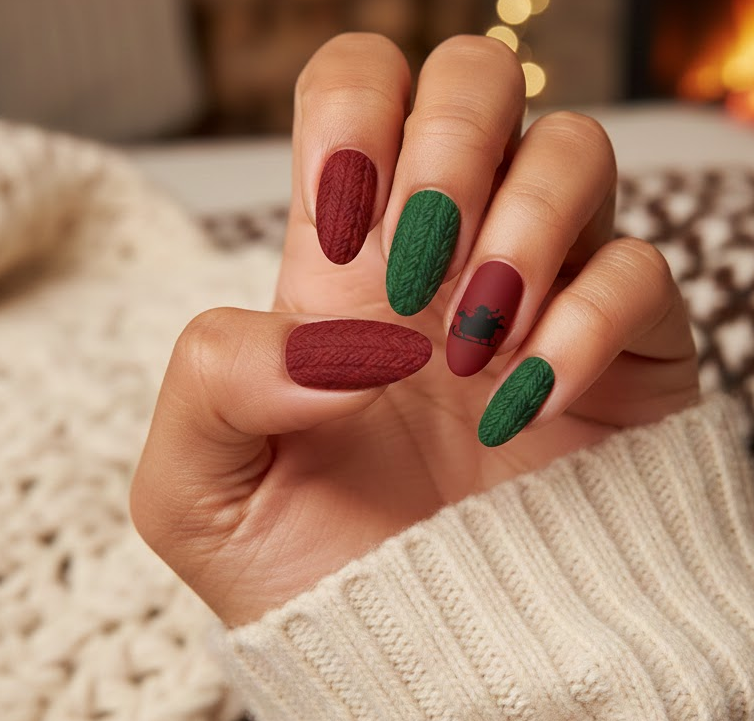
Wrap your nails in cozy Christmas sweater vibes! Start with a deep red or green, then draw intricate cable-knit patterns for a satisfying, textural look. The magic finishes with a tiny, silhouetted Santa and sleigh flying across one nail—a charming mix of comfort and wonder.
3. Santa Hat French Tips
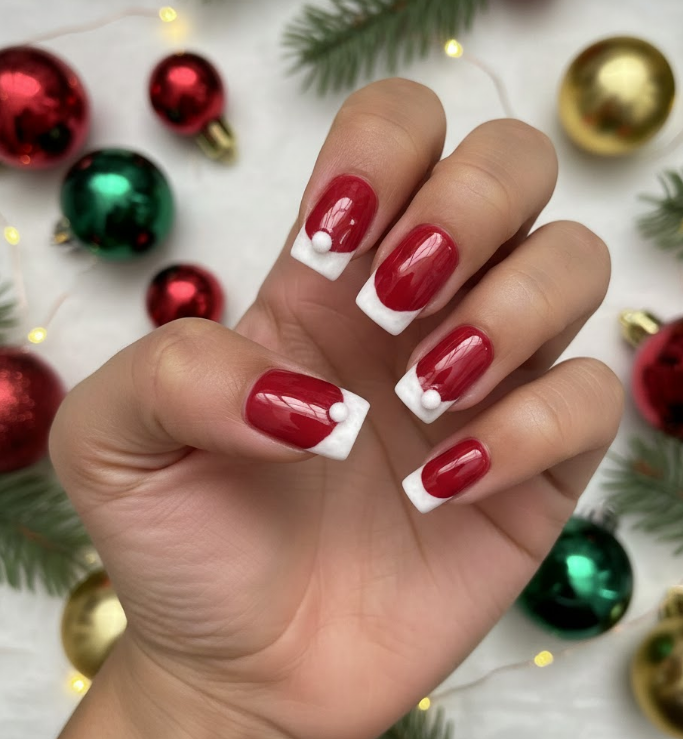
Give the classic French manicure a festive twist! Each nail becomes Santa’s iconic hat with a white fur-trimmed tip and a red body, topped with a cute white pompom. It’s chic, playful, and joyfully simple to do.
If charming winter characters make you smile, these 20 woodland-inspired holiday nail designs are perfect for you — too cute to skip.
4. Negative Space Belt & Buckle
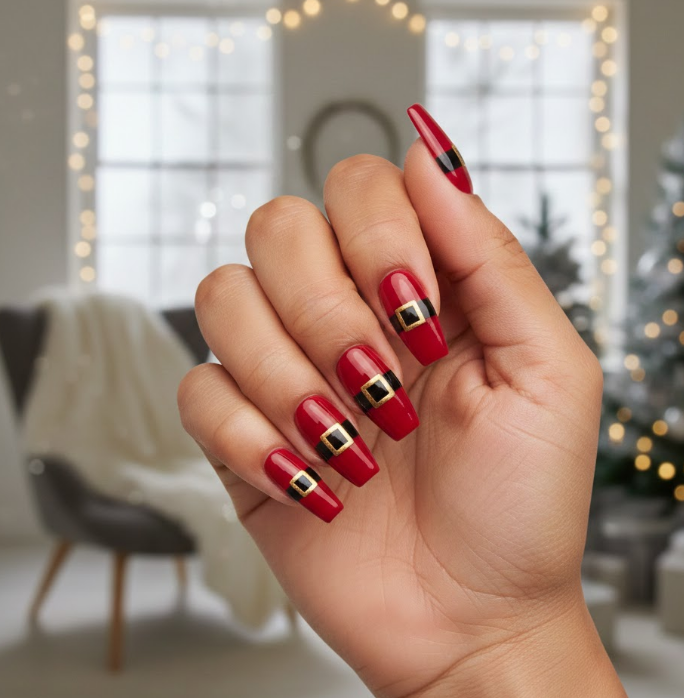
Channel Santa’s sleek style with this chic, modern look. Paint a bold black belt across each red nail, leaving or outlining a perfect little square in the center as a shiny buckle. It’s a clever, stylish nod to the season that feels sophisticated and fun.
5. Glitter Gradient Beard
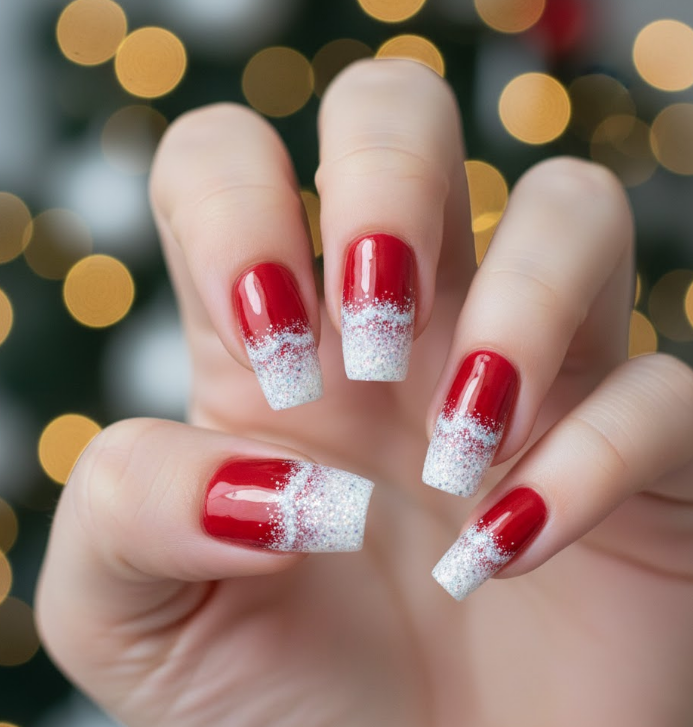
Dive into holiday sparkle! Over a solid red base, sponge on a gradient of white glitter at your cuticles to create Santa’s glittering, frosty beard. Drag a tool through while wet for a fuzzy texture. It’s a dazzling, festive effect that’s pure magic.
If nature-inspired festive nails catch your eye, these 15 evergreen-themed holiday manicure styles are perfect for you — magical and elegant.
6. Mrs. Claus & Santa Duo

Celebrate the North Pole’s favorite couple! Feature Santa’s face on one nail and lovely Mrs. Claus on another, complete with rosy cheeks and a tidy white bun. It’s a heartwarming, adorable duo full of character and cheer.
7. Santa’s Sleigh Scene
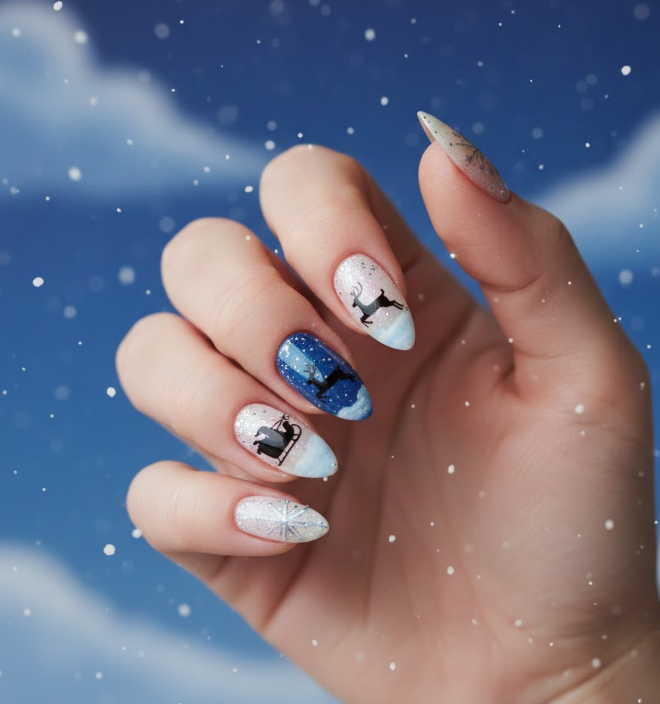
Create a mini winter wonderland! Paint a soft blue sky, add reindeer silhouettes, and feature a detailed, gift-filled sleigh on an accent nail. Finish with falling snow dots. It’s an immersive, storybook scene that’s a true delight to wear.
If glowing festive vibes make you happy, these 25 luminous holiday sparkle nail styles are perfect for you — total show-off material.
8. Cartoon Santa Character Nails
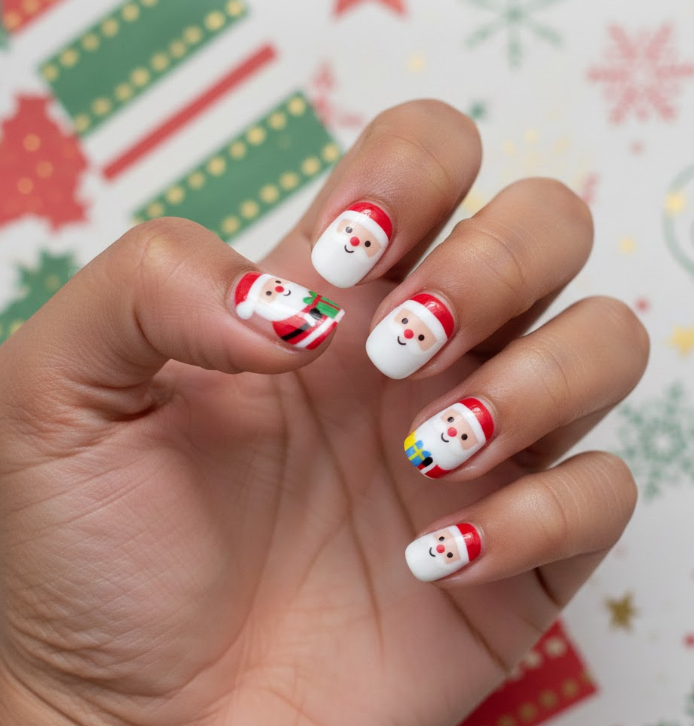
Embrace playful, childlike joy with cute cartoon Santas! Paint simple circle faces with dot eyes and puff-beards, paired with bright colors and fun extras like little gifts or gloves. It’s an upbeat, forgiving design that’s sure to make you smile.
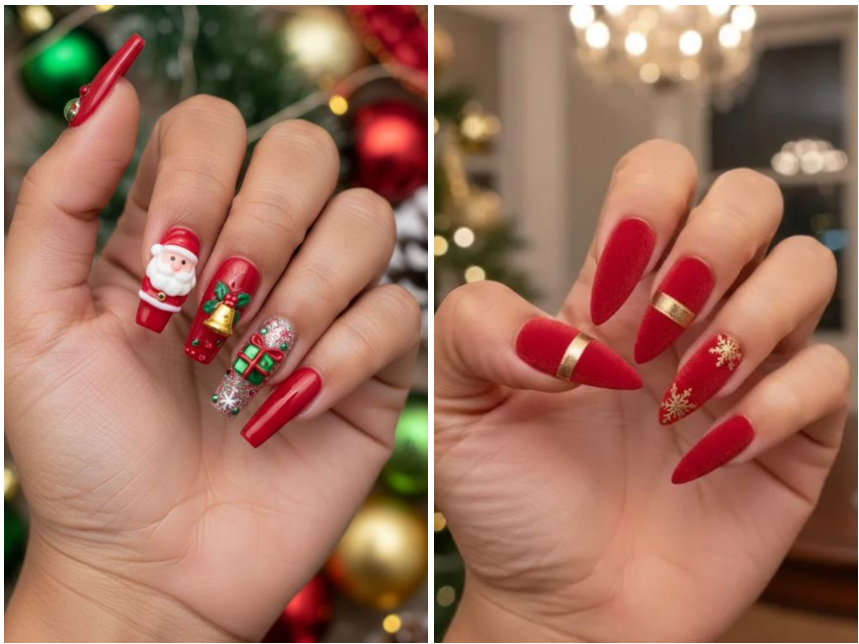
9. Velvet Matte Suit Nails
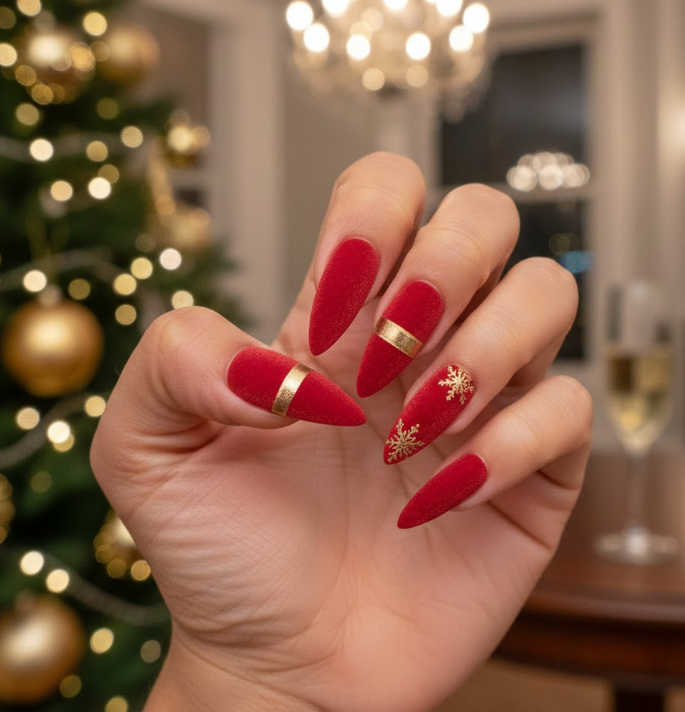
Indulge in luxurious sophistication. A rich red polish transformed by a matte top coat feels just like Santa’s velvety suit. Add a single thin gold stripe or tiny buckle for a stunning, elegant contrast. It’s deeply satisfying and chic.
If elegant Christmas glam excites you, these 15 jewel-tone and gold-accent manicure ideas are waiting for you — pure holiday magic.
10. 3D Charm Extravaganza
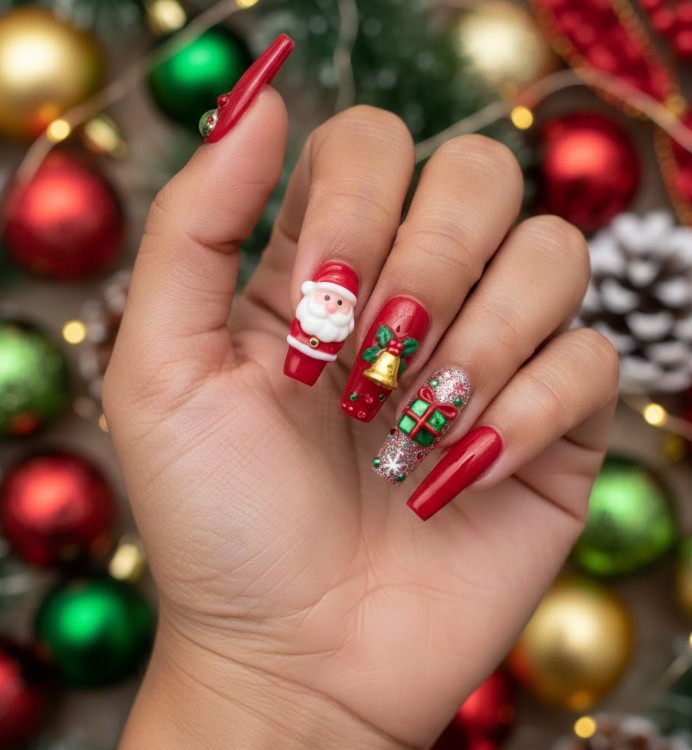
Go all out with festive bling! Adhere tiny 3D charms like Santa faces, bells, and gifts onto a solid base, then seal them under a glossy top coat. It’s a joyful, textured treasure hunt for your nails that’s irresistibly fun to touch and admire.
Humanize 482 words
Your Complete Pre-Design Preparation
Before you dive into creating these designs, proper preparation is the key to a long-lasting, beautiful manicure.
A. Nail Prep:
- Shape & Length: File your nails to your desired shape and length—whether short and practical or long and almond-shaped.
- Cuticle Care & Buffing: Gently push back cuticles and lightly buff the nail surface to remove shine and create a smooth base for polish to adhere to. Always clean the nail thoroughly with alcohol to remove oils.
B. Base Coat:
Never skip this step! A good base coat prevents staining from dark red or green polishes, smooths the nail surface, and significantly extends the life of your nail art by helping the color adhere.
Santa’s Workshop: Your Color Palette & Essential Tools
A. Core Colors: Build your palette around these essentials:
- Christmas Red & Snow White: The non-negotiable classics.
- Forest Green, Metallic Gold, and Black: For accents, belts, and details.
- Flesh Tones or Light Pink: For creating Santa’s face.
B. Essential Tools:
- Dotting Tools & Thin Liner Brushes: For details, faces, and line work.
- Striping Tape & Nail Vinyls/Stencils: For crisp lines and perfect shapes.
- Makeup Sponge: For creating smooth glitter or sky gradients.
- Nail Art Pens: Great for beginners attempting details.
C. Top Coats: Seal your masterpiece. A glossy top coat adds shine and depth, while a matte top coat can create a velvety suit effect. A quick-dry top coat is a lifesaver for preventing smudges.
Finding Your Level & Mastering Techniques
Design Complexity Levels:
- Beginner: Start with accent nails (like #1 or #3), solid colors with glitter, or use stickers.
- Intermediate: Try detailed line work (#2, #4), basic character faces (#6), or simple gradients (#5).
- Advanced: Tackle full scenes (#7), intricate shading, and 3D charm application (#10).
Application Techniques:
- Freehand: The most common method, using brushes directly on the nail.
- Stamping: Use Christmas-themed stamping plates for perfect, intricate patterns quickly.
- Using Vinyls/Stencils: Achieve sharp, clean lines for shapes like belts (#4) or hat tips (#3).
- Embellishments: Don’t shy away from adding glitter, rhinestones, or 3D charms for extra holiday sparkle.
For Gel Polish Users:
Remember to cure properly under an LED/UV lamp between each layer. After the final cure, wipe away the sticky residue with alcohol, and finish by applying cuticle oil to nourish the surrounding skin.
Maintenance & Gentle Removal
To keep your Santa nails looking fresh, reapply your top coat every 2-3 days. When it’s time to remove them, be gentle. Soak cotton pads in acetone, place them on each nail, and wrap with foil for 10-15 minutes before gently wiping the polish away. This method is much kinder to your nails than harsh scraping.
Conclusion
Santa Claus nail art is a joyful and creative way to wear your holiday spirit on your sleeve—or rather, on your fingertips! Whether you’re a beginner trying a single Santa hat or an advanced artist crafting a panoramic sleigh ride, the process is all about embracing the fun and magic of the season. So gather your red and white polishes, channel your inner elf, and create a festive manicure that’s sure to spread cheer. After all, ’tis the season to be jolly, from your heart right down to your nails!