Alright, grab your coffee (or wine, no shame here!) and settle in. Remember that time I tried gold leaf on my nails for my cousin’s wedding? Looked like a toddler attacked my fingertips with craft glue. Total disaster. But when you get gold and brown right? Honey, it’s like slipping your hands into the coziest cashmere gloves dipped in liquid sunshine. It’s not just polish – it’s a vibe. Autumn walks, that first sip of spiced latte, the way sunset hits old books… that’s what we’re painting onto your nails today. Ready to ditch the boring beiges? Let’s get gloriously messy.
Forget Rules, Answer These Instead:
Will I look like I dipped my hands in mud?
Heck no! If your skin leans cool (think pinkish or rosy), go for lighter browns like warm caramel or toasted almond with a soft, brushed gold. Feels like sunlight. Warmer skin (olive, golden, deep)? You were born for rich chocolate browns and blinding, mirror-shiny gold. Own it!
Not sure where your tone fits? Check out our breakdown of 20 Different Brown Nail Shades for Every Mood & Occasion. It helps you match the perfect brown polish to your vibe – from latte soft to espresso bold.
Do I want ‘oh, nice nails’ or ‘HOLY COW WHAT IS THAT?
Subtle queen? Try a barely-there sheer brown wash with one finger sporting a tiny gold wax seal (like #3). Want jaws to drop? Go full molten lava cracks (#7) or meteorite crash site (#11). No in-between needed.
And if bold is your middle name, don’t stop at brown – 20 Maroon Nail Designs That Beat Burgundy in Style delivers that deep, dramatic energy you might be craving next.
18 Ways to Make Your Fingers Look Like Art (That Won’t Require an Art Degree):
1. Honey-Dipped Hexagons
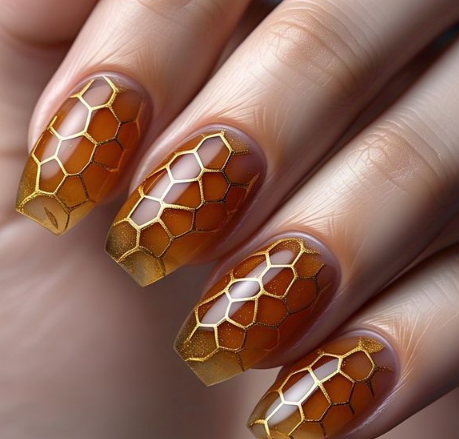
For: Nature lovers who secretly adore bling.
The Look: A sheer, warm amber-brown base (think real honey!) with slightly raised gold lines forming hexagon cells. Like a chic bee designed your nails.
My Mess-Up Tip: Use a thin nail art brush or a toothpick for the lines. My first try looked like a drunk spider web.
2. Desert Fossil Finds
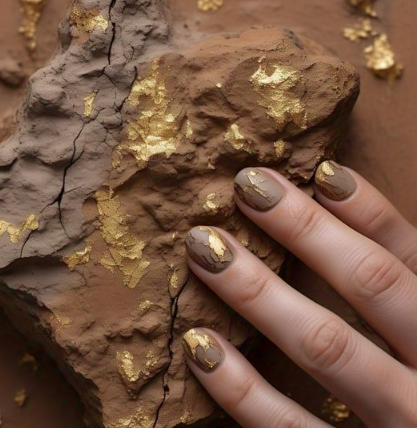
For: The quiet earthy soul.
The Look: A textured, sandy taupe-brown base (like sun-baked rock) with pressed gold foil pieces shaped like tiny shells or abstract imprints. Up close? Ancient magic.
My Mess-Up Tip: Press the foil firmly but gently. Peeling it off too soon leaves sad, bald patches. Ask my pinky.
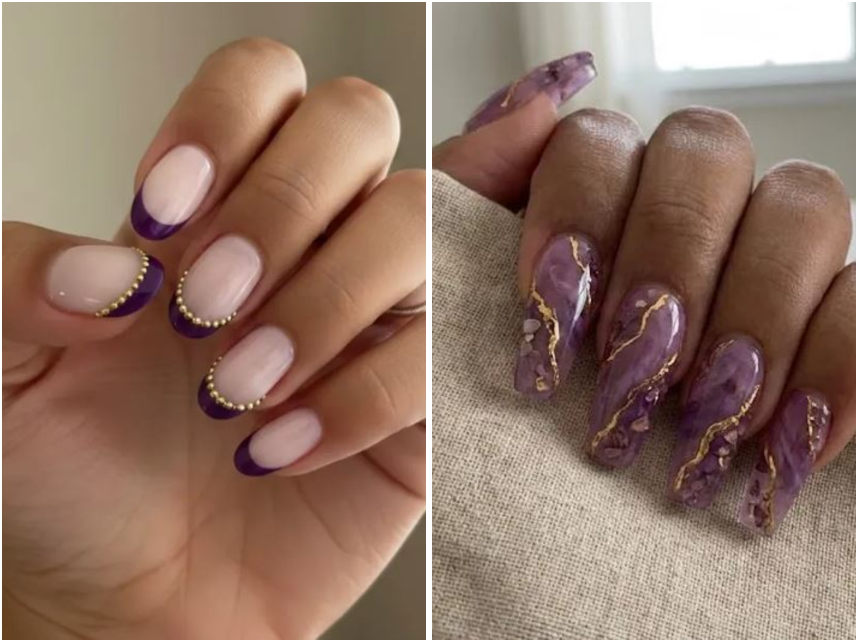
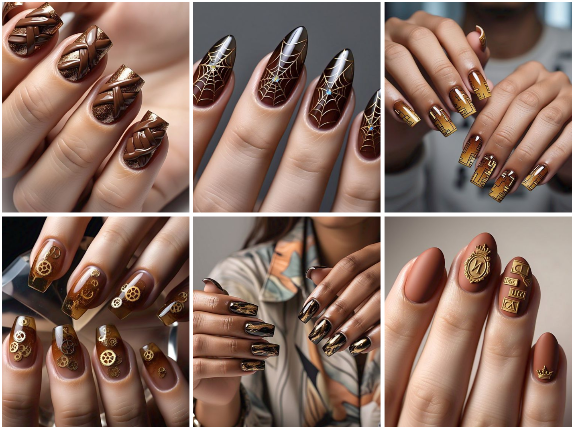
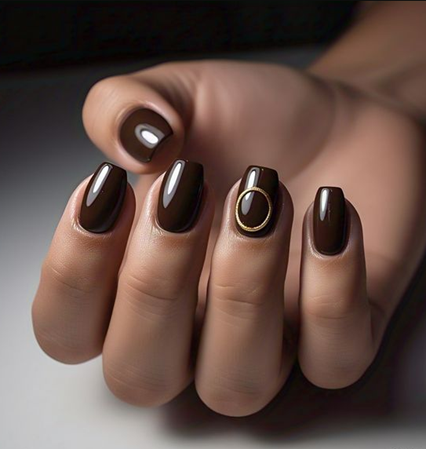
3. Wax Seal Drama
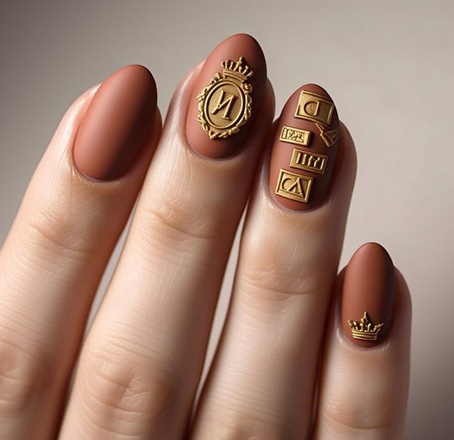
For: Vintage romance addicts.
The Look: Matte, terracotta-brown nails (like old clay pots) with one nail boasting a chunky 3D gold emblem – a crown, your initial, a tiny lion head? Instant heirloom energy.
My Mess-Up Tip: Nail glue is your only hope for the seal. Superglue = sticky disaster. (R.I.P. my favorite sweater cuff).
4. Ink-Spill Elegance
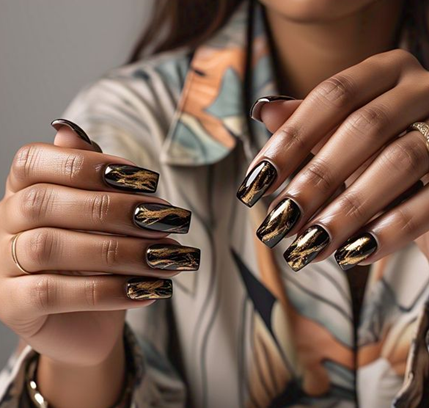
For: Coffee shop poets & messy creatives.
The Look: Deep, glossy espresso-brown base with wisps of gold swirling up from the tips, like ink dropped in water. Purposefully imperfect.
My Mess-Up Tip: Do this fast while the brown is still wet! Let it dry even a bit? Swirls turn into sad blobs.
5. Floating Gears
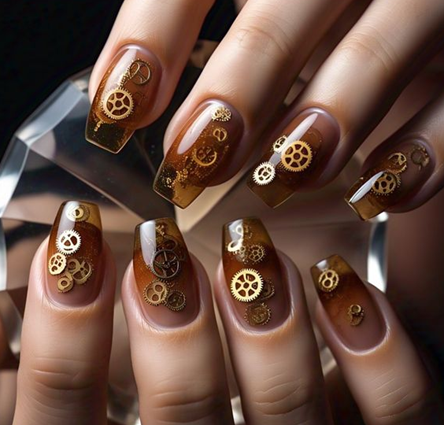
For: Edgy tea-drinkers.
The Look: A clear, light brown gel base (like iced tea!) with tiny, flat-back gold gear charms suspended inside the gel layer. Industrial but delicate.
My Mess-Up Tip: Place the gears before the final gel cure layer. Dropping them on top? They snag everything.
6. Woodgrain & Gold Stitches
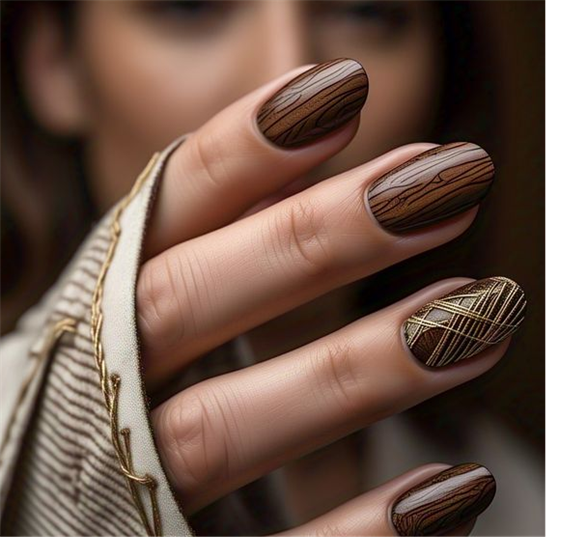
For: Cabin-core meets runway.
The Look: Rich walnut-brown base etched with realistic wood grain lines, then “stitched” along the grain with impossibly thin gold thread or polish lines. Cozy yet luxe.
My Mess-Up Tip: A striping brush is essential. Trying with a regular brush? Wonky “stitches” guaranteed.
7. Molten Earth Cracks
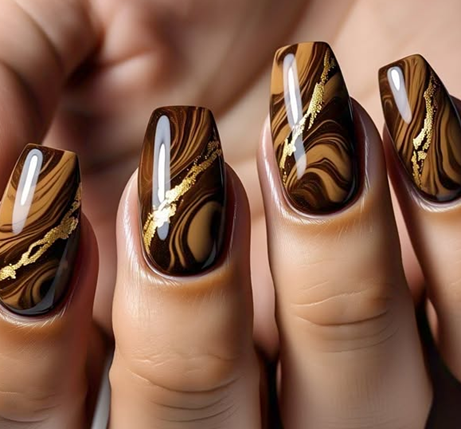
For: When you want to look expensive.
The Look: Swirled, marbled dark brown base (like molten chocolate) split right down the middle with jagged, glowing gold cracks. Fiery and fierce.
My Mess-Up Tip: Use striping tape or a super thin brush for the crack first, fill with gold, then peel the tape off. Freehand cracks? Rarely end well.
8. Dusty Sunset
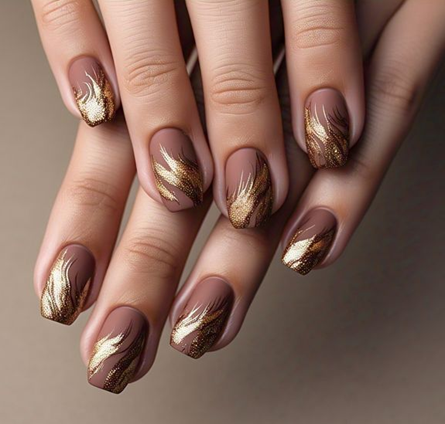
For: Effortless boho vibes.
The Look: Matte, clay-brown base with gold glitter lightly brushed sideways across the nail, heavier at one edge. Like desert wind caught the glitter.
My Mess-Up Tip: Tap off most glitter from the brush first. Dunking it straight on? Hello, disco ball overload.
9. Silky Ribbon Wrap
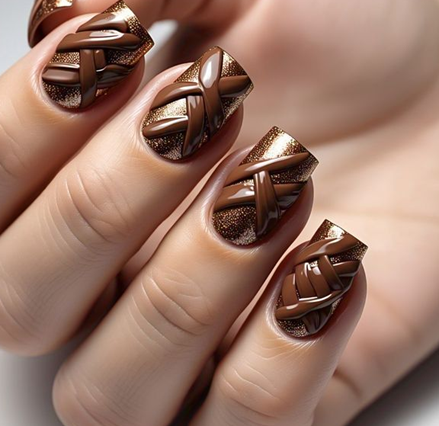
For: The eternal gift-giver.
The Look: Shiny, sparkly gold base with thick, glossy 3D ribbons of milk or dark chocolate brown looping over it. Feels like your nails are wrapped presents.
My Mess-Up Tip: Use thick gel or acrylic for the ribbons. Regular polish sinks. Sad, flat ribbons.
10. Smoky Gold Webs
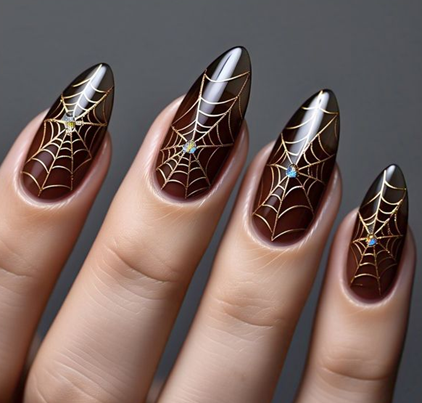
For: Year-round spooky elegance.
The Look: A sheer, smoky brown base (like good bourbon) with delicate gold web lines drawn on, and tiny clear crystals or microbeads where the threads cross. Hauntingly pretty.
My Mess-Up Tip: A dotting tool is perfect for web anchors. Freehand webs often look like scribbles.
11. Meteor Shower Nails
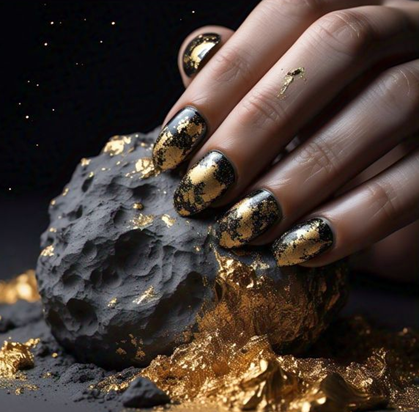
For: Sci-fi lovers with style.
The Look: A bumpy, charcoal-brown base (like moon rock texture!) with random splatters of thick, melted-looking gold foil pieces. Like celestial gold crashed onto your nails.
My Mess-Up Tip: Texture paste under the brown base! Smooth polish won’t sell the “rock” look.
12. Glitchy Caramel Tips
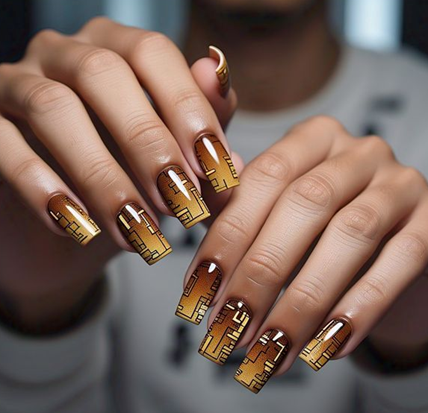
For: The cozy gamer girl.
The Look: Smooth caramel-brown nails fading into bright gold tips, overlaid with thin, digital-looking “glitch” lines in black or darker brown. Retro tech warmth.
My Mess-Up Tip: Use a super fine liner brush or nail art pen. Bobby pins are too thick for clean glitches.
13. Frost-Kissed Autumn Leaf
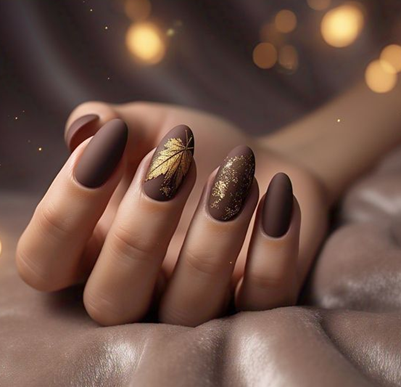
For: Forever autumn hearts.
The Look: Matte mid-brown base with one realistic pressed dried leaf (mini maple? Oak?) or a perfect sticker. Then, sprinkle tiny gold glitter specks just over the leaf like frost.
My Mess-Up Tip: SEAL that leaf under a thick top coat before the glitter! Unsealed? It flakes off instantly.
14. Cracked Earth Gold Sap
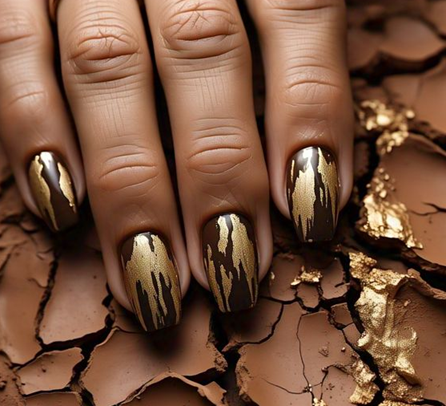
For: Bold nature babes.
The Look: Deep brown base with a thick, cracked “mud” texture. Gold gel polish or thin lines of gold foil peeking through the cracks, like molten gold sap rising. Wild and earthy.
My Mess-Up Tip: Use a crackle top coat over the brown before adding the gold in the cracks. Trying to paint cracks? Nope.
15. Gilded Thorn Vines
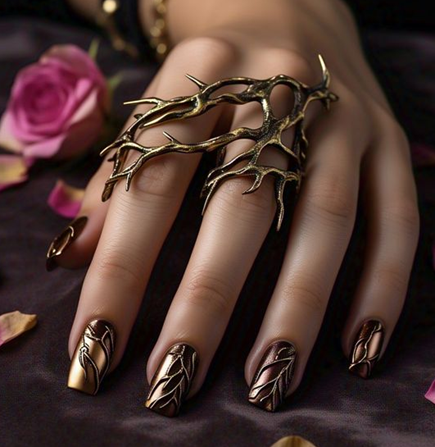
For: Gothic garden fairies.
The Look: Deep, dark espresso brown base with twisty, thorn-covered gold vines painted crawling up the sides. Edgy romance.
My Mess-Up Tip: Paint the vine stem first, then add tiny “thorns” with a dotting tool. Doing it all at once? Messy thorns.
16. Ancient Bronze Statue

For: Museum wanderers.
The Look: A moody blend of brown fading into a mossy greenish-gold nails, mimicking aged bronze. Like you just dug up treasure.
My Mess-Up Tip: Blend a tiny bit of green polish into the gold! Pure gold won’t give that aged patina.
17. Pixelated Cookie Flowers
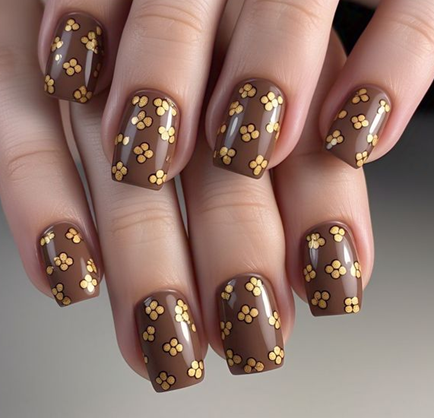
For: Nostalgic bakers.
The Look: Smooth milk chocolate brown base with chunky pixel “flowers” made of tiny gold dots (like an 8-bit game). Simple, sweet, playful.
My Mess-Up Tip: Use the end of a bobby pin dipped in gold polish for perfect dots. Freehand dots? Lumpy pixels.
18. Solar Eclipse Silhouette
For: Cosmic daydreamers.
The Look: Deep brown “sky” base with a perfect circular halo of gold near the tip, fading into smoky brown edges. Like viewing an eclipse through amber.
My Mess-Up Tip: A hole reinforcement sticker is PERFECT for the crisp eclipse circle. Freehand circles? Usually lopsided. Like my first attempt.
Getting It Done Without Tears (Mostly):
Scrub & Smooth: Wash hands, push back cuticles gently (don’t massacre them!), buff nails lightly, swipe on base coat. Brown will stain naked nails. Learned that the hard way.
Patience, Grasshopper: Thin coats of brown! Let each dry properly (like, actually dry – check it!). Rushing? Smudges and sadness. Put on a podcast.
Gold Time! Tiny brush for details, sponge for glitter gradients, tweezers for foil/charms, glue for 3D bits. Pick your chaos.
Lock. It. Down. Shiny top coat = glassy perfection & protects your art. Matte top coat = instant velvety sophistication. Don’t skip!
Fix the Oops: Tiny brush dipped in acetone? Lifesaver for cleaning up wobbly edges. Cotton swabs work too, but less precise.
Pro Tip From My Many Mistakes: For 3D stuff (ribbons, seals, gears)? Apply your top coat around them carefully, not thickly over them. Drowning them makes them look cloudy.
Ready to Make Your Hands the Star?
Whether you’re rocking the quiet luxury of #3 or the cosmic drama of #18, gold and brown nails are like that perfect leather jacket – they just work. Don’t overthink it. Grab a brown polish, some gold glitter, and PLAY.
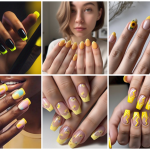
Need inspo across the color wheel? Bookmark Light & Pale Yellow Nails for breezy spring moods, Brown Nail Shades for everyday elegance, and Maroon Nail Designs when you want that “main character” energy.
Snap a pic! Tag me! I’ll be the one double-tapping with my own (probably slightly chipped) gold-tipped thumbs. Let’s get gloriously warm and luxe!
Real Talk (Your Actual Questions Answered):
1. How long before this chips?
Honest? Depends if you’re hand-washing dishes or treating them like crown jewels! Good top coat? 5–7 days for regular polish. Gel? Up to 2 glorious weeks. Mine usually chip day 3 because I’m rough.
2. “Can I really do this myself?”
Start simple! Gold glitter on brown tips (#8 vibes) is easy. The 3D stuff? Maybe work up to it. But hey, trying is half the fun (and the mess!).
3. “I messed up the gold! Help!”
Deep breath. Tiny brush or cotton bud dipped in acetone. Gently wipe just the oopsie. Redo that spot. Happens to me EVERY. TIME.
4. “Does gold polish clash with my silver ring?”
Mix it up! Gold nails + silver jewelry looks cool and intentional. Like you know exactly what you’re doing (even if you don’t!).
5. “What about my skin tone?”
Repeat after me: Gold and brown flatter EVERYONE. Cool skin? Lighter browns + softer golds. Warm skin? Deep browns + bright golds. Deep skin? Metallic gold POPs like crazy. It’s magic!