
We have noticed that many people want to remove gel polish and nail glue without damaging their nails. However, when we conducted research and looked at real experiences, we found that no one has provided a complete guide that is truly useful for beginners.
Most of the time, the basic method removes polish easily. However, if there are too many layers or the polish is very strong, it might not come off completely. Many people try the basic steps but still struggle to remove everything.
That is why we have created a complete article in which we also share real home experiences, so that you can remove polish and glue while keeping your nails safe and undamaged.
First, you need to check the thickness and stickiness of the polish or gel on your nails. After this, one of the step-by-step methods given below will help you.
A. How to Remove Gel Nail Polish
Method 1. Acetone Method That Every Expert Tells
This method is the most normal and easy, which anyone can try at home. Its benefit is that it also takes less time and the risk of nail damage is also less.
Our recommendation is that this method is best for those whose nails have a soft top layer and can be removed gently. If you also have such nails, then this method is perfect for you.
Required Tools:
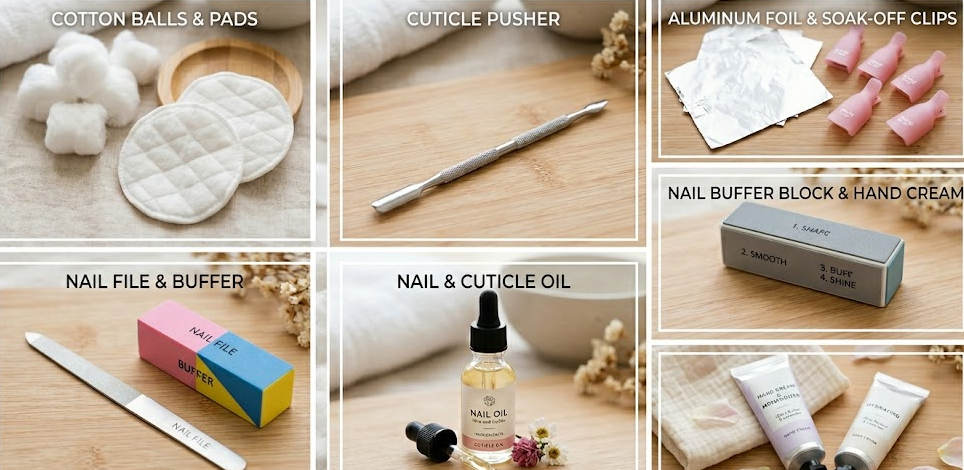
- 100% Pure Acetone – to dissolve gel polish
- Cotton balls / cotton pads – to soak in acetone
- Aluminum foil / Soak-Off Clips – to secure cotton on the nail
- Nail file / buffer – to gently file the top layer
- Cuticle pusher / Orangewood stick – to gently push the polish
- Nail buffer block (optional) – to remove residue polish
- Nail oil / cuticle oil – to hydrate and nourish nails
- Hand cream / moisturizer – to keep nails and skin hydrated
Step-By-Step Process
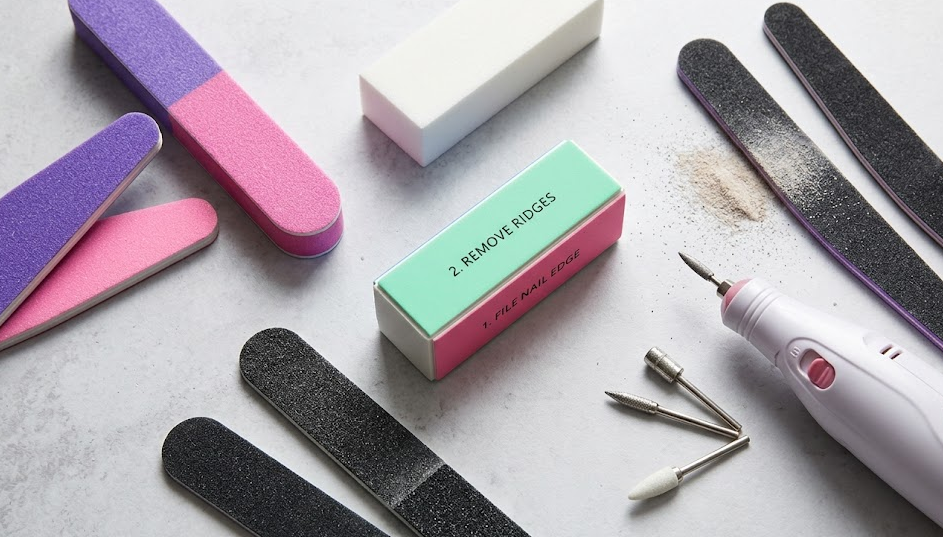
Step 1: Prepare Your Nails
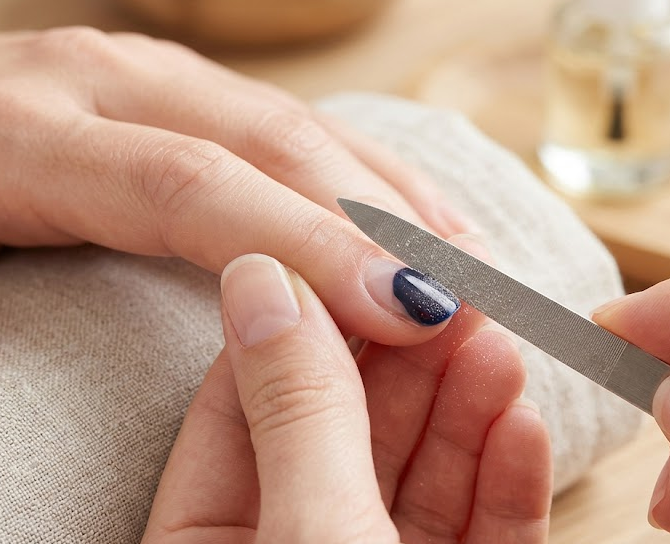
- Gently file the top layer with a nail file
- Goal: to break the polish seal so that acetone can penetrate
- Keep in mind: file up to the base coat, do not damage natural nail
Chooys Nails Tip: Stop if the polish color starts to become transparent
Step 2: Soak Cotton in Acetone
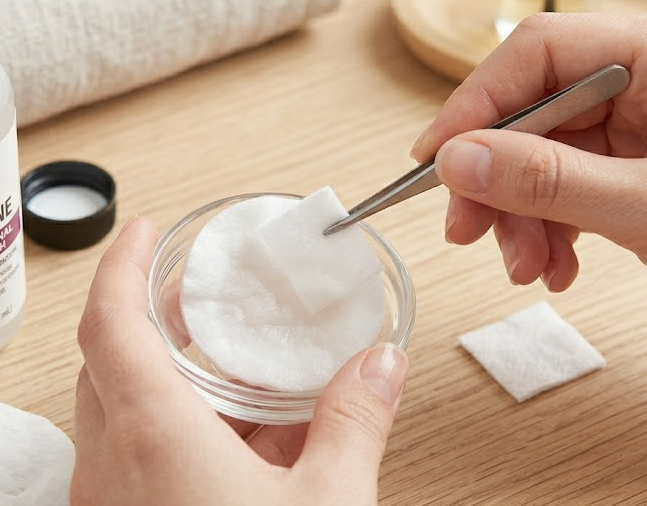
- Dampen a cotton ball or pad in acetone (not dripping)
- Use separate cotton for each nail
Step 3: Apply Cotton and Wrap
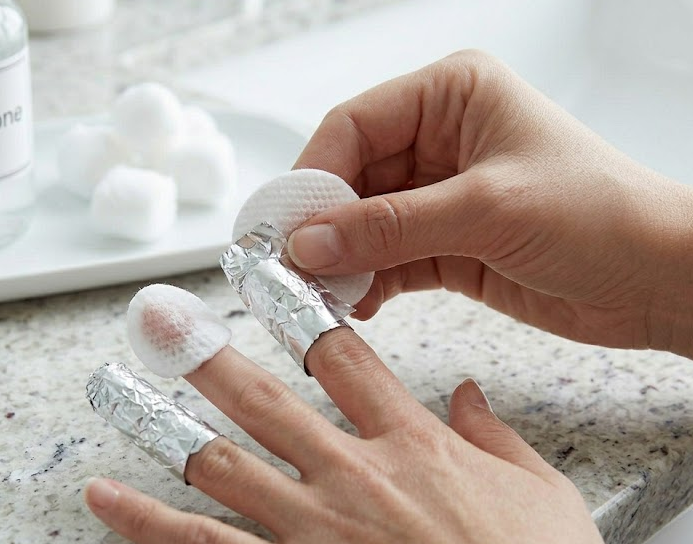
- Place acetone-soaked cotton on the nail
- Secure with aluminum foil or soak-off clips
- Ensure cotton covers the entire nail surface
Step 4: Wait for Acetone to Work
- Wait 10–15 minutes
- Acetone will soften the polish
Chooys Nails Tip: Patience is key – scraping too early can damage nails
Step 5: Remove Cotton and Gently Scrape
- Remove foil / clips
- Softly push polish with cuticle pusher / orangewood stick
- Do not apply too much force
Step 6: Buff Any Remaining Residue (Optional)
- If there is some polish residue, gently buff with a buffer block
- Over-buffing can weaken nails
Important Note:
Always buff only after the glue has been softened or removed. Never buff hard glue directly, as it can damage the nail plate.
Step 7: Nourish Your Nails
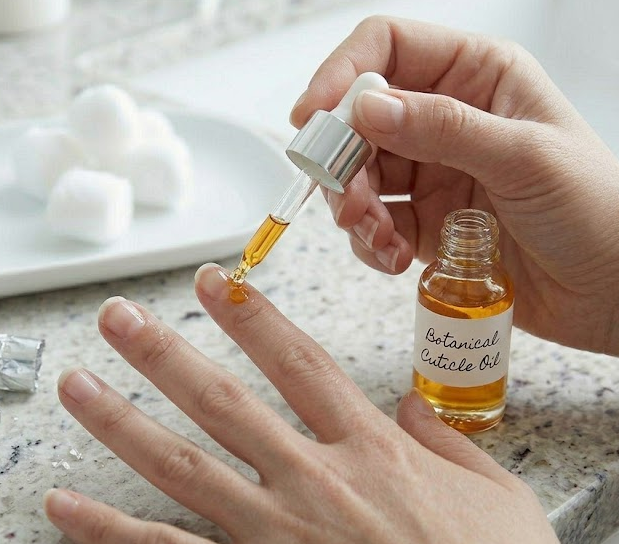
- Apply nail oil / cuticle oil
- Massage to promote hydration and nail growth
Step 8: Moisturize Hands
- Apply hand cream / lotion
- This keeps both nails and skin hydrated
You can watch this video for a complete step-by-step guide to help you through the process.
Helpful Tips for Acetone Method
Base Coat Protection Method: If the base coat is good, leave it, over-filing keeps natural nails safe
Top Layer Observation: If the polish top layer looks soft and transparent, this method is the fastest and safest
Use Separate Cotton: Use separate cotton for each nail so acetone works evenly
Gentle Pressure: Always use gentle pressure while scraping, do not scratch nails
Hydration After Removal: Be sure to use nail oil and hand cream, acetone removes dryness.
Method 2 – When Acetone Method Doesn’t Work
Are you also among those who have tried all the steps of the acetone method, but still the polish or gel is not coming off?
The real problem lies here.
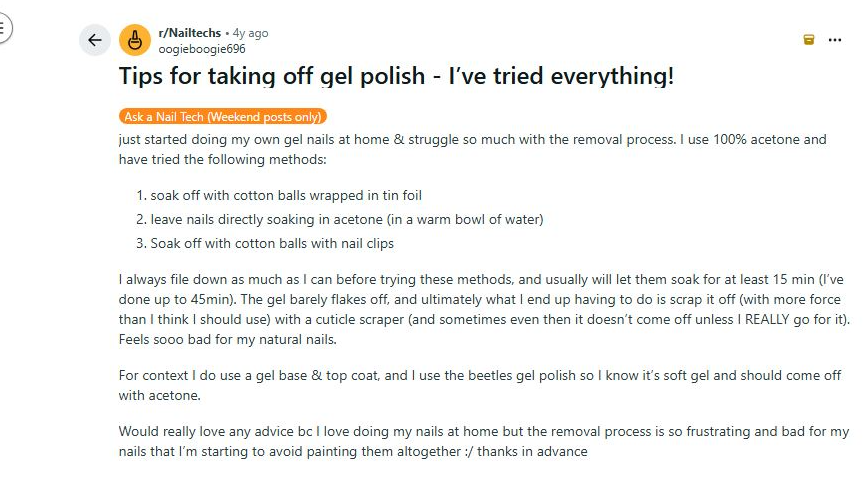
We have noticed that on Reddit and online forums, many people are facing this problem. One user said:
“I’m using nail polish acetone, is that why I’ve been soaking my toes since like 3 (it’s 6:29 now…) and am having so much trouble?? Not even the smaller pieces left over are coming off. I’m getting so frustrated 😭 did the lady put on too many layers??”
Possible Reasons
When this kind of issue happens, it could also be your mistake. It could be that the nail polish or gel you applied is not of a good brand. We recommend that you use trusted and high-quality nail brands, whose products are recommended by nail artists themselves.
Many nail professionals say that the main issue is often the wrong technique or low-quality brand products. Therefore, always pay attention to both the brand and application technique, so that there is no problem in removing polish or gel.
Solutions for Stubborn Gel / Polish
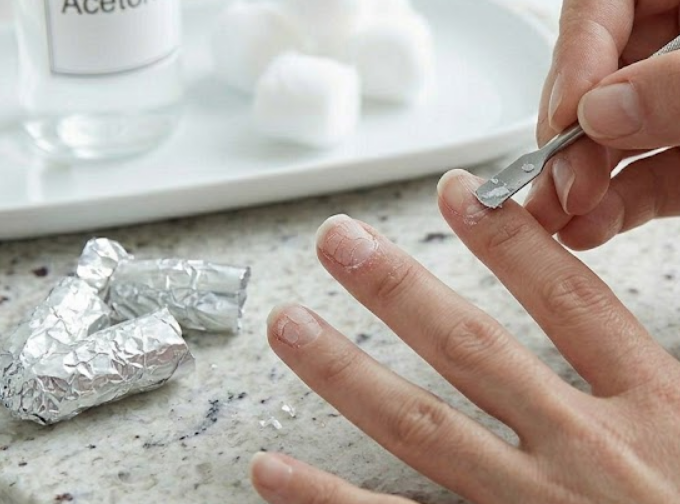
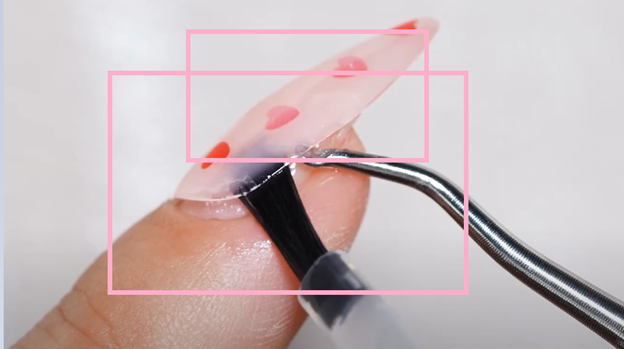
1. Cuticle Scraper Technique
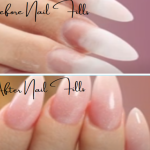
A client’s experience on Reddit was (You can see the attached picture) that when the polish did not come off even after acetone soak, they gently used a cuticle scraper.
After cotton and acetone, the polish can be gently lifted with soft scraping.
Keep in mind: do not apply force, do not scratch or damage nails.
2. Electric Nail File Method
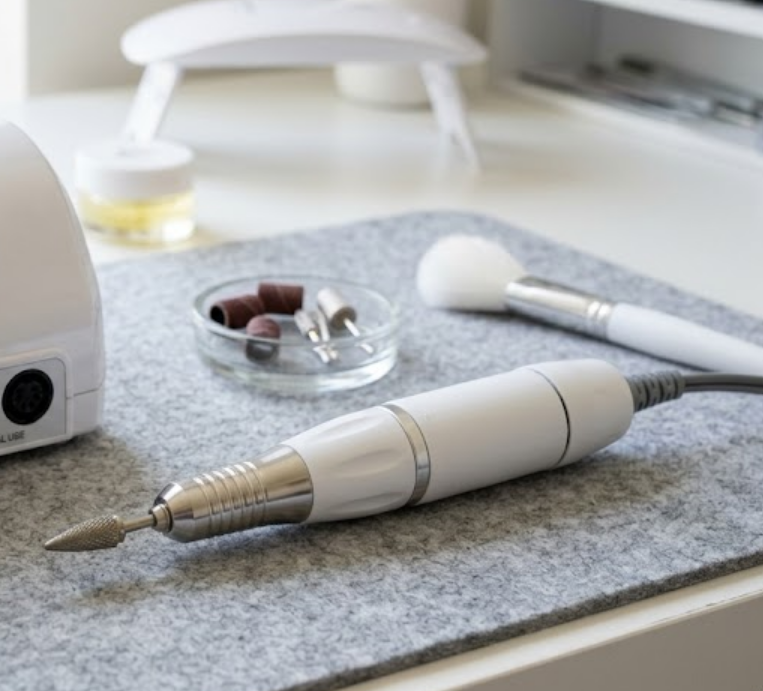
If the problem is not solved by scraping, an electric nail file (e-file) can be used:
Slowly and carefully file the top layer.
Then repeat the acetone soak + foil method.
This technique is effective for thicker gels and multiple layers.
Chooys Nails Tip: These solutions are for those whose nails do not have a soft top layer or the gel is thick, and the simple acetone method is failing. These techniques can be a bit difficult and may also damage nails. It may be that you do not have an electric nail file machine, so we recommend consulting an experienced nail artist. Always pay attention to brand and technique so that nails remain safe.
B. How to Remove Nail Glue at Home
If you have understood the acetone method (gel polish removal) given above, then here you will also have to follow the same basic pattern — that is soaking, softening and gentle removal. But the nature of nail glue is different, that is why some extra and unique techniques are used in it.
Why is this stuff such a pain?
It’s basically super glue for nails (cyanoacrylate, if we’re being fancy). It bonds crazy fast with moisture – like the natural oils in your skin. Great for hold, terrible for accidental spills or messy applications. Trying to just peel it off raw skin? Ouch. Redness, irritation, maybe even a tiny tear?
Basic Pattern (Same as Above Method):
- First the area has to be softened and loosened (soaking / oil / acetone)
- Then gentle rubbing or scraping
- At the end hydration and nail care
Unique Methods for Nail Glue Removal
1. Warm Water + Oil Soak (Gentle Method):
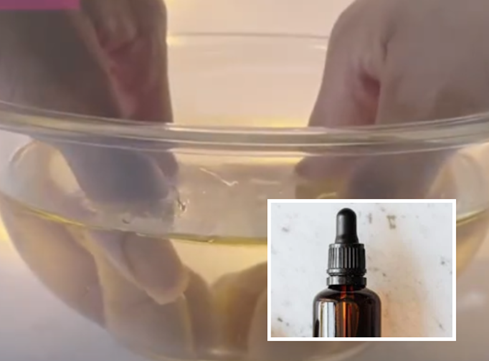
If the glue is fresh or light then warm water + oil soak is best.
- Add warm water and a little oil (coconut / olive) in a bowl
- Soak for 10–15 minutes
- The glue slowly becomes loose
This method is safe and skin-friendly And This does NOT fully remove strong glue, it only helps loosen it.
2. Acetone Spot Treatment (Strong Method):
If the glue is very strong then apply acetone directly on the spot
- Dip cotton in acetone and hold it on the glue (10 min)
- Then gently rub with a soft brush or cloth
- This is fast but makes the skin dry
3. Petroleum Jelly / Lotion Method (Sensitive Skin):
If the skin is sensitive:
- Apply Vaseline or thick lotion
- Massage and leave it for a few minutes
- The glue slowly breaks
This is a slow but safest method and Vaseline/lotion does NOT actually break glue bonds It only:
softens skin, helps reduce irritation and may loosen edges slightly
4. Light Buffing (Only for Nails):
If glue residue remains on the nails:
- Gently buff with a fine buffer
- Avoid over-buffing
Aftercare (Most Important Step)
No matter which method you use, the last step will always be the same:
- Be sure to apply cuticle oil + moisturizer
- Nails and skin need hydration
- Ignoring this step is the biggest mistake
Chooys Nails Pro Tip: If you’re new to press-ons, this is a great time to review our guide on sizing them perfectly to prevent future sticky mishaps
The Golden Rule:
In the end, the message is simple — whether you are removing gel polish or nail glue, the most important things are using the right technique and having patience. Rushing or applying too much force can always damage your nails, whereas gentle methods give you safe and clean results.
In this guide, we’ve shown you easy home methods for both situations, real problems people face, and practical solutions so you can take care of your nails without going to a salon. Just remember that every nail is different, so choose your method based on your specific situation.
Most importantly — never skip nail care and hydration after removal. Healthy nails are the foundation of beautiful nails.
FAQS:
FAQs (Answered Like a Friend Who Cares):
Can I just RIP these acrylics off? Pleeease?
Girl, I feel you! But PLEASE DON’T. It takes your natural nail layers with it, leaving them weak, thin, and painful. File the bulk off first, then soak. Your future nails will thank you. Seriously, resist the urge!
“How long should I give my nails a break between sets?”
Listen to your nails! If they’re thin, peeling, or bendy, give them weeks, maybe even a month or two. Keep them short, baby them with oil and strengthener (look for keratin or calcium formulas). Healthy nails hold the next set better!
“Removed my acrylics, now my nails are sad. Help!”
Keep ’em short and strong! Oil them multiple times a day (keep a bottle by your bed, desk, bag). Use a good nail hardener (but avoid formaldehyde if sensitive). Wear gloves for dishes. Be patient – they will grow back!
“Will hot water melt the glue?”
Not exactly “melt,” but warm/hot water definitely helps soften and loosen it, especially combined with soap or oil. Think of it as relaxing the glue’s grip.
“Can I use vinegar instead?”
Honestly? It’s pretty weak for nail glue. Warm water or oil works better for a gentle approach. Vinegar/lemon juice might eventually help a tiny bit, but acetone or Vaseline are way more reliable. Save the vinegar for pickles!
“Does rubbing alcohol work?”
Yes! It’s better than nothing, especially for fresh glue or cleaning tools. Soak nails after a warm water soak, or dab it on glued skin. It evaporates fast, so you might need to reapply. Less drying than acetone.
Vaseline really works for glue?
For skin? Absolutely! It’s my gentlest go-to for glued fingers or patches on skin. It won’t dissolve rock-hard glue instantly like acetone, but with patience (and maybe a soak), it gets the job done safely. Slather it on!


Hi! I could have sworn I’ve been to this web site
before but after browsing through a few of the articles
I realized it’s new to me. Anyhow, I’m definitely delighted I stumbled upon it and I’ll be book-marking it
and checking back regularly!
Sure 😊 Glad you found it! Feel free to explore and visit Choosy Nails anytime.