Sometimes, you need a little sparkle. And not just any sparkle—a shot of electric, soul-lifting, head-turning blue sparkle. Blue glitter nails are more than just a manicure; they’re a mood. They’re the confidence of a deep sapphire, the serenity of a tropical lagoon, and the mystery of a midnight sky, all rolled into one dazzling package.
But with so much inspiration out there, where do you even begin? We’ve done the deep dive for you, curating 15 of the most stunning blue glitter nail art ideas that range from subtly chic to full-on glam. Consider this your ultimate guide to getting that perfect, show-stopping set. Your next manicure inspiration starts now.
15 Blue Glitter Nail Designs:
The Celestial Collection
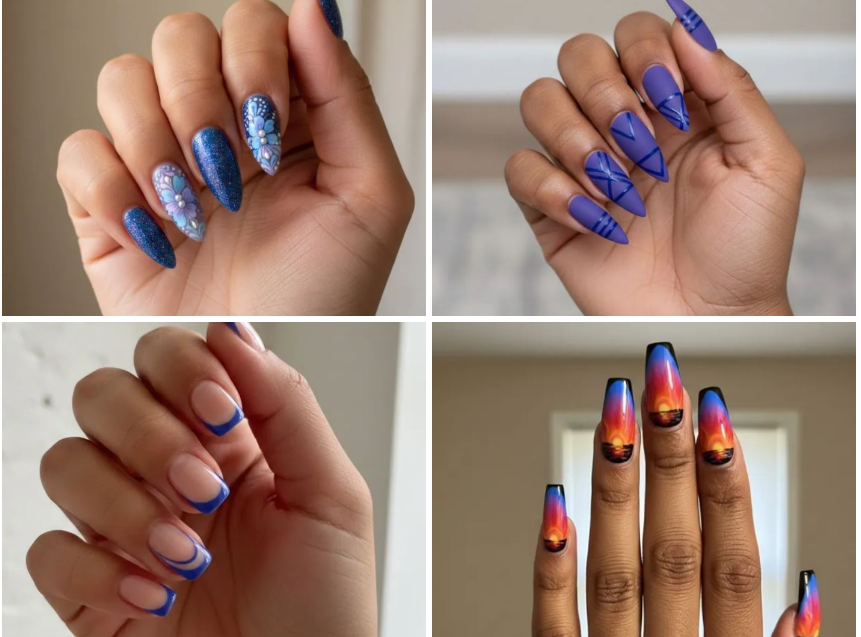
1. The Midnight Galaxy
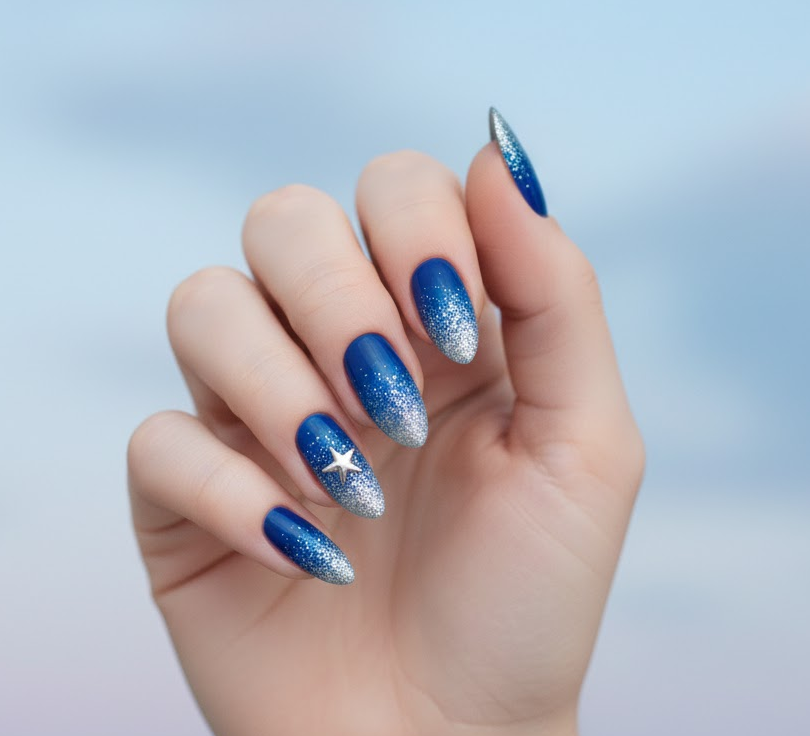
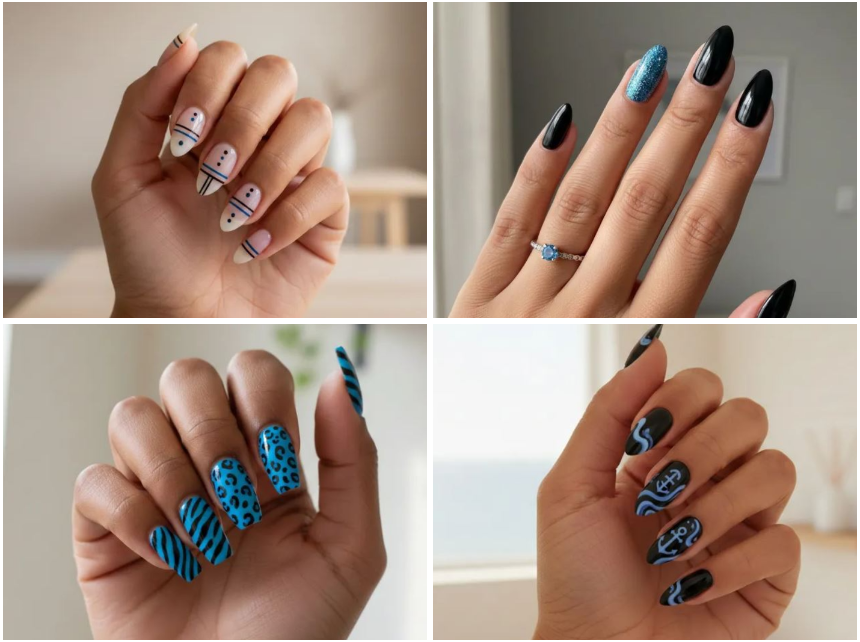
Imagine: A base of the deepest, darkest navy—almost black—like the vast expanse of space. Then, a fine, scattered glitter in cobalt and silver is dabbed on, mimicking distant stars. The pièce de résistance? A tiny, precise constellation or a single silver star on your ring finger.
- Pro Tip: “For the most realistic starry effect, use a glitter polish with multiple sizes of glitter. A matte top coat will make it look like a velvety night sky, while a glossy one feels more like a clear, wet evening.”
Can’t resist deep-shade shine? These 20 navy-and-onyx metallic manicures will instantly elevate your nail game — check them out!
2. The Crescent Moon Magic
Imagine: A minimalist’s dream. Your nails are filed to a soft, squoval shape and given a clean, clear coat. At the base, hugging your cuticle, is a perfect crescent moon filled with a dense, royal blue glitter. It’s artful, cool, and leaves plenty of negative space.
- Pro Tip: “Don’t have a steady hand? Use hole reinforcement stickers as a guide. Place them to create the crescent shape, press down firmly, and pack the glitter inside. Peel off carefully for a perfect crisp line.”
Looking for soft sophistication? These 15 denim-and-ice matte styles will give your nails a cool, stylish vibe — click to explore!
3. The Aurora Borealis

Imagine: A sheer, iridescent blue base that shifts in the light. Over it, wisps of holographic blue and green glitter are airbrushed or softly sponged on, creating the ethereal, flowing effect of the Northern Lights. It’s mesmerizing and utterly unique.
- Pro Tip: “A gel base coat in a sheer blue or even a blurple (blue-purple) shade is perfect for this. The key is to use a very light hand and build the glitter intensity slowly for that soft, wispy effect.
Can’t resist deep elegance? These 29 midnight-and-steel matte nail designs are perfect for a bold yet understated look — check them out now!
The Modern & Minimalist
4. The Glitter Fade
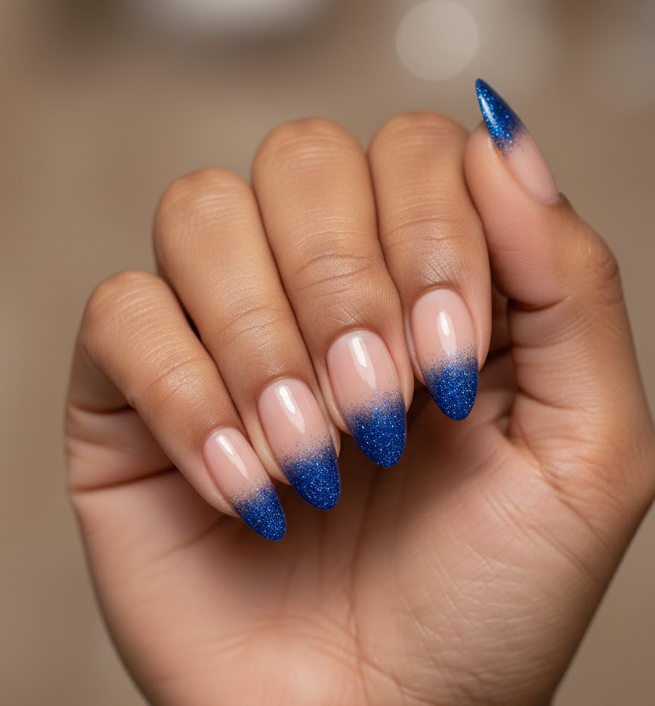
Imagine: A modern, graphic take on glitter. Starting at your cuticle, a thick line of cobalt glitter is applied. As it moves down your nail, it softens, fades, and disappears before it reaches the tip, leaving a clean, bare nail. It’s like a glitter comet tail.
- Pro Tip: “To achieve this seamless fade, use a small, flat brush dipped in a tiny amount of acetone to blur and soften the edge of the glitter before it dries.
Obsessed with soft-to-bold transitions? These 20 cobalt-and-cerulean ombre styles are perfect for showing off your nail creativity — click to explore!
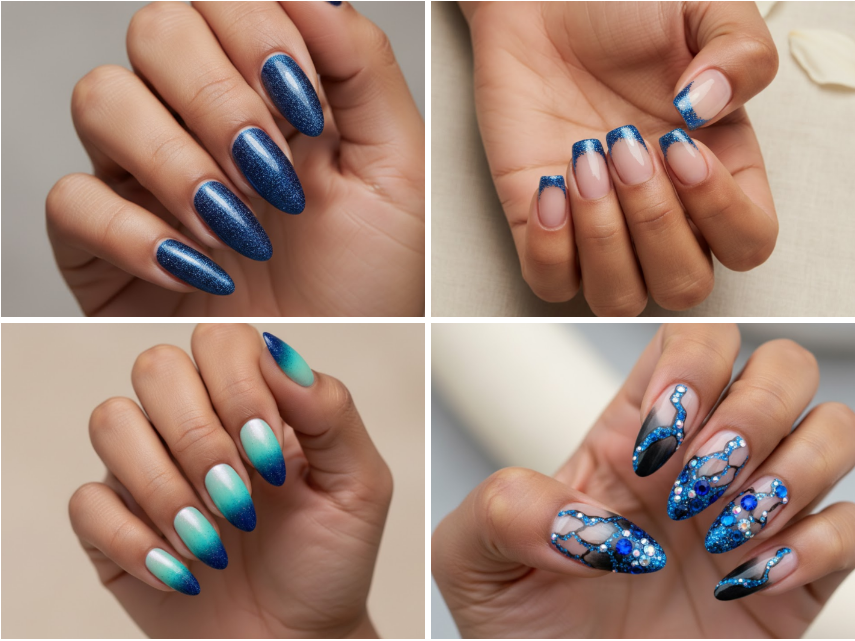
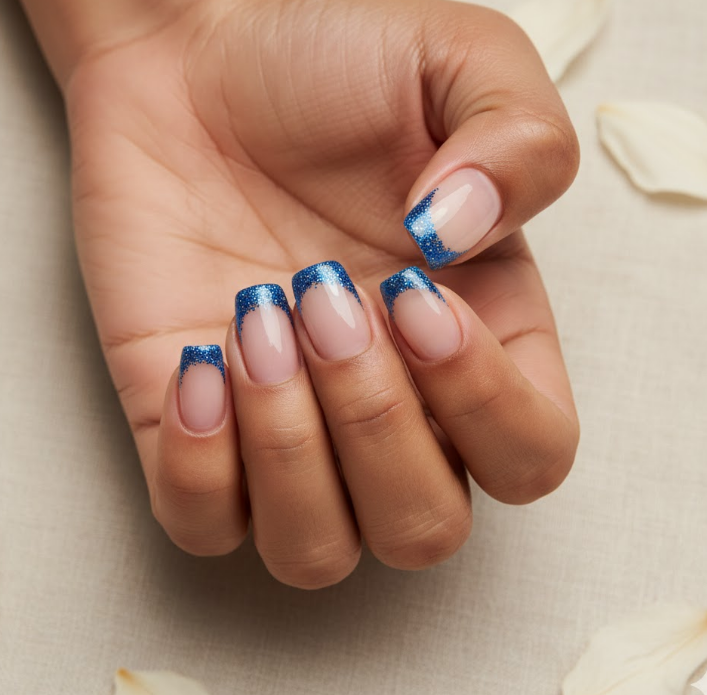
5. Blue Glitter French Tips
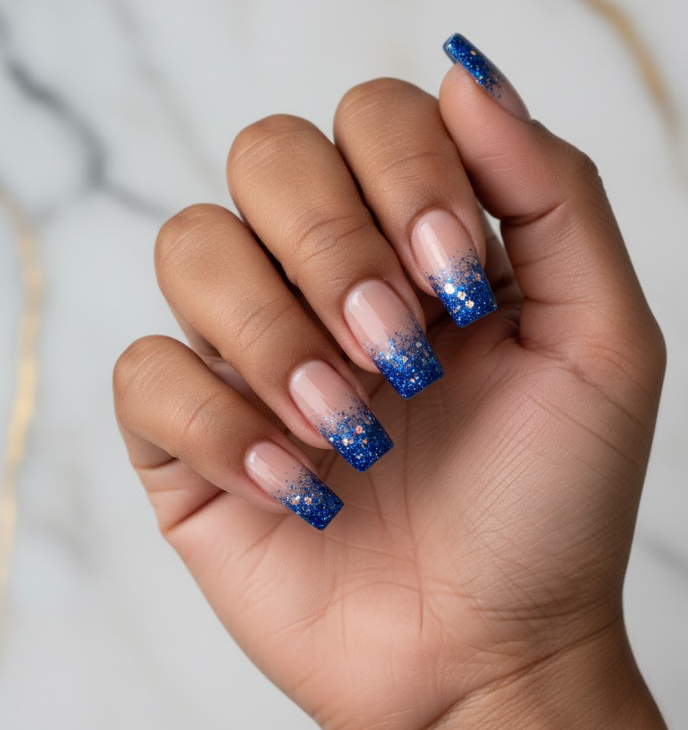
Imagine: The timeless French manicure, but make it fashion. Instead of a white tip, you get a crisp, brilliant line of blue glitter. It’s elegant enough for a boardroom but has just enough edge for a cocktail party.
- Pro Tip: “For the sharpest, cleanest line, use striping tape. Paint your base color, let it dry completely, apply the tape just below where you want the tip, and then paint on your glitter polish.”
Can’t resist sparkling neutrals? These 20 silver-and-graphite glitter nails are perfect for a subtle yet eye-catching manicure — check them now!
6. The Glitter “Eyeshadow” Lid
Imagine: Inspired by a smoky eye, this design places a soft, diffused cloud of blue glitter only at the base of your nail, almost like your nail is winking. It’s a subtle and incredibly chic way to wear glitter.
- Pro Tip: “A small, dense eyeshadow blending brush is your secret weapon here. Dip it into loose glitter or a glitter polish and gently stipple it onto the base of the nail for a soft, airbrushed look.
Can’t resist playful glam? These seafoam-and-jade glitter manicures will instantly brighten your fingertips — click to see them!
The Bold & The Beautiful
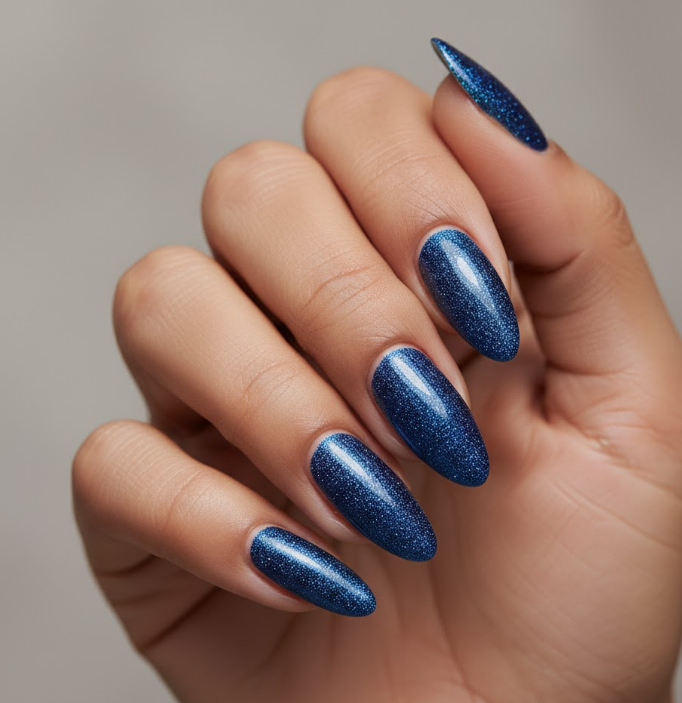
7. The Full-On Sapphire
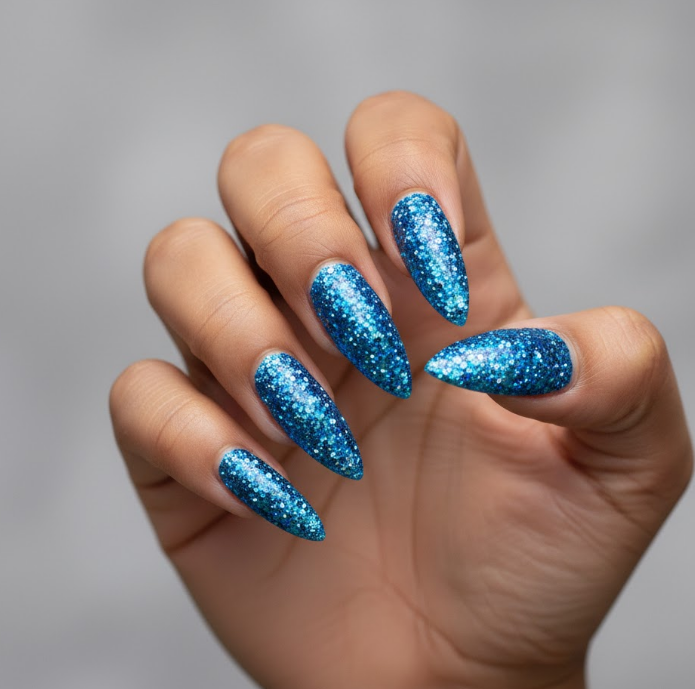
Imagine: No half-measures. Every nail is completely encased in a dense, opaque layer of multi-tonal blue glitter. It’s a solid block of sparkle, like a precious gemstone was melted onto your fingertips. This is for when you want to be seen from space.
- Pro Tip: “The trick to a smooth, non-gritty finish is a thick, no-wipe gel top coat. It sinks into the glitter, creating a glassy surface. If you’re using regular polish, the ‘dab don’t swipe’ method with the glitter polish gives the best coverage.”
8. The Blue Geode
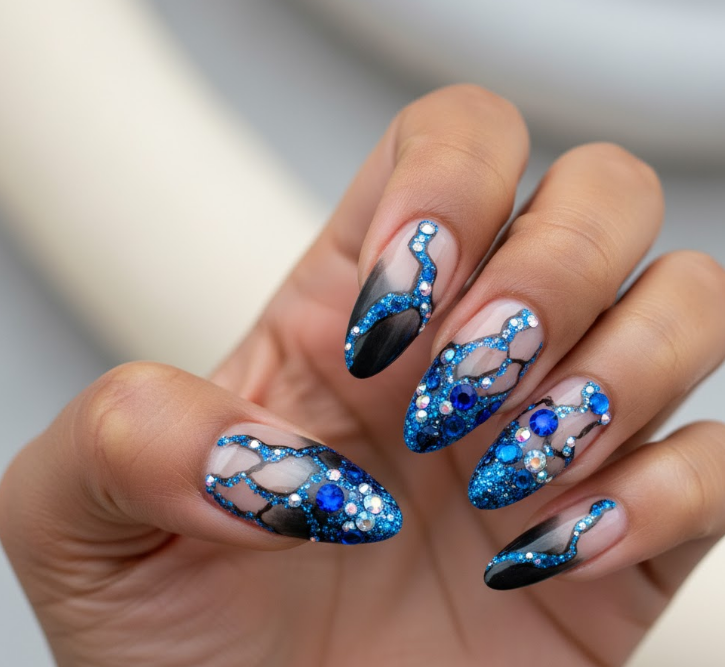
Imagine: A slice of a glittering crystal geode on your nails. A nude or black base is cracked open with jagged, crystalline lines filled with chunky blue hexagonal glitter, microbeads, and tiny rhinestones. It’s high-art, high-texture, and high-impact.
- Pro Tip: “Build the geode shape with a thick layer of clear gel or nail glue before sprinkling on the chunky glitter. This gives it dimension and ensures everything stays put.”
9. The Glitter Smash
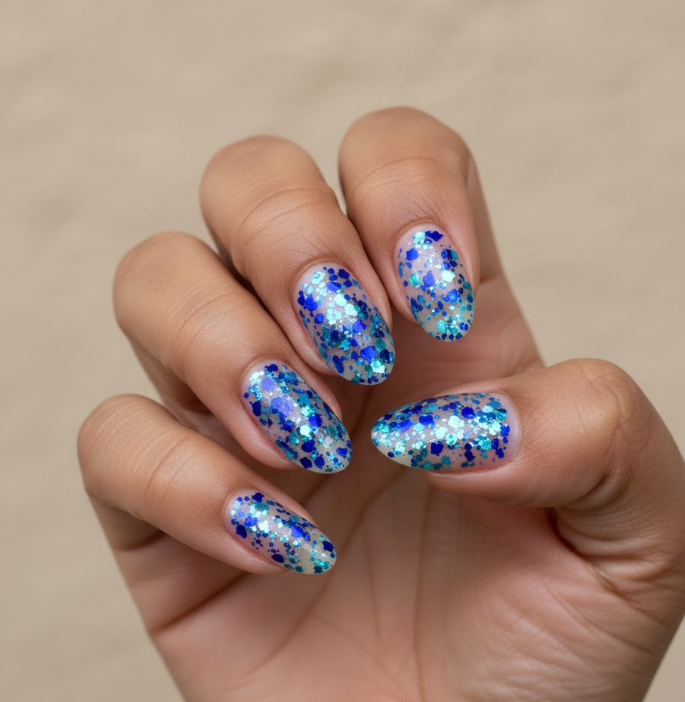
Imagine: Pure, abstract artistry. It looks like a vial of blue glitter exploded on your nails in the best way possible. Different sizes and shades of blue glitter are artfully scattered and layered over a clear or colored base, with no two nails alike.
- Pro Tip: “Embrace the chaos! Use a combination of glitter polishes and loose glitter. Apply them randomly with a toothpick or a dotting tool for a truly one-of-a-kind set.”
The Textured & Tactile
10. Blue Velvet
Imagine: The name says it all. This uses an ultra-fine, smooth “sugar” or “velvet” glitter that feels as smooth as it looks. It has a foiled, metallic finish without a single bump, creating a sleek, liquid-metal effect in a stunning shade of blue.
- Pro Tip: “For maximum color payoff, always apply this type of glitter over a cream base coat in a similar shade. Two thin coats of the glitter will give you that perfect, opaque, velvet finish.”
11. Icy Snow Queen
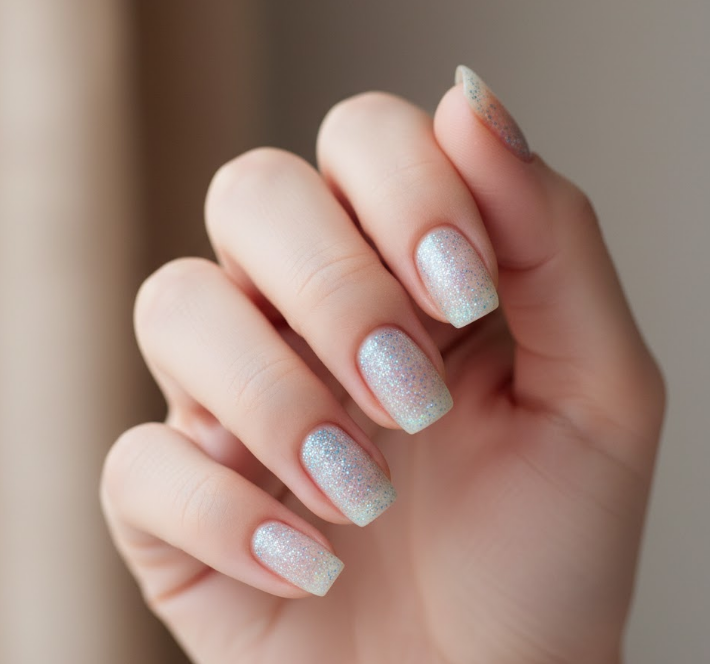
Imagine: This is what Elsa would wear on her day off. A sheer, milky white or pale blue base is the canvas for a dense layer of silvery-blue iridescent glitter. It catches the light like frost on a windowpane—delicate, cool, and utterly magical.
- Pro Tip: “A white jelly polish is the perfect base for this look. It provides that milky, translucent background that makes the icy glitter truly pop.”
The Gradient & Ombré
12. The Ocean Wave Ombré
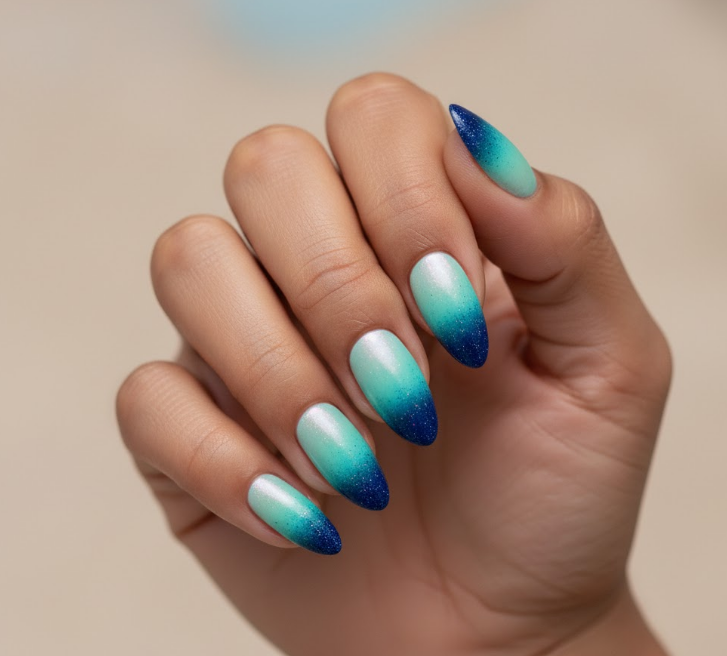
Imagine: The perfect sunset over the ocean, translated onto your nails. It starts with a pale, shimmery aqua at your cuticles, blends into a medium turquoise, and finally deepens into a glittering navy at the tips. It’s a breathtaking, wearable work of art.
- Pro Tip: “The trusty makeup sponge is your best friend for ombré. Paint stripes of your chosen glitter polishes directly onto the sponge, then dab it gently onto your nail until the gradient is seamless.”
13. The Silver-to-Blue Shift
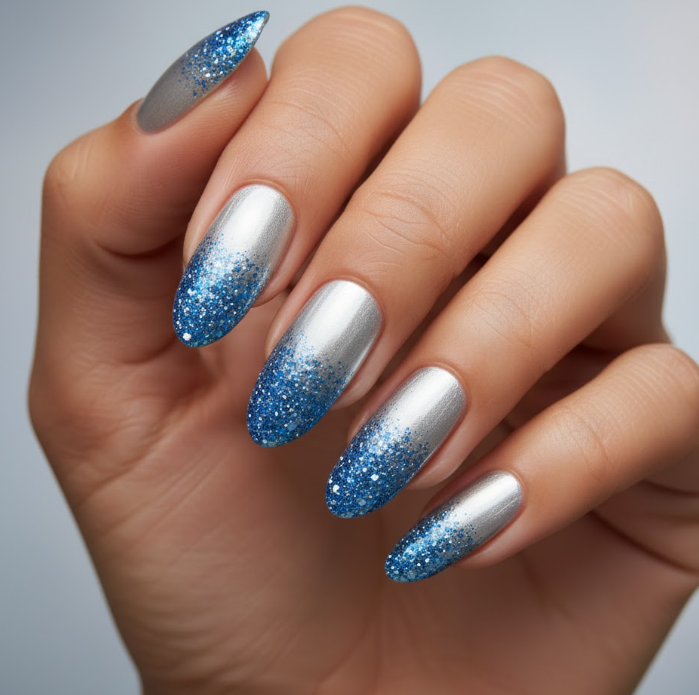
Imagine: A metallic marvel. This gradient starts with a pure, mirror-like silver chrome at the base that seamlessly shifts into a brilliant blue glitter at the tip. It’s futuristic, glamorous, and incredibly eye-catching.
- Pro Tip: “This works best with a gel system. Apply your base color, then use a sponge to create a silver-to-blue glitter gradient. While the top coat is still wet, rub the silver chrome powder onto the base of the nail for that flawless metallic transition.”
The Accent & The Artistic
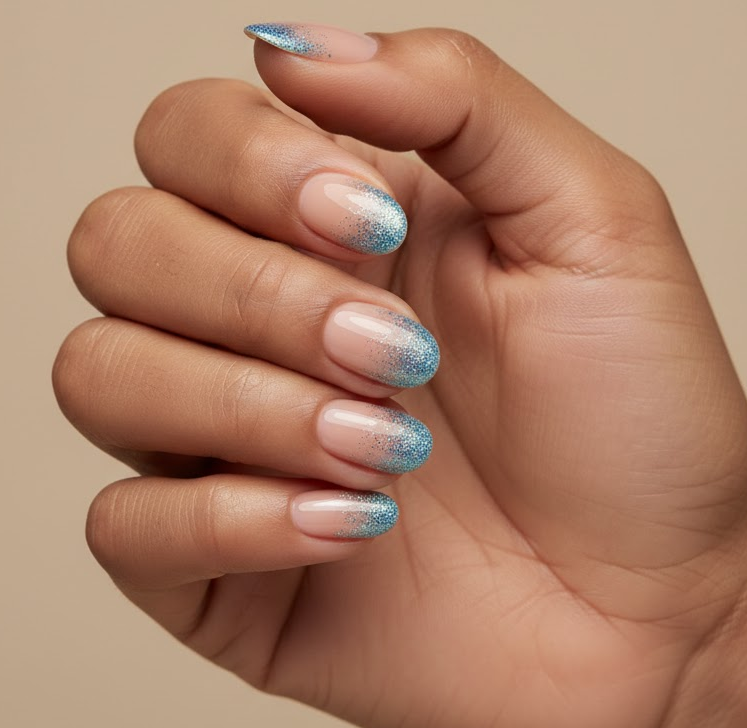
14. The Glitter Cuticle Aura
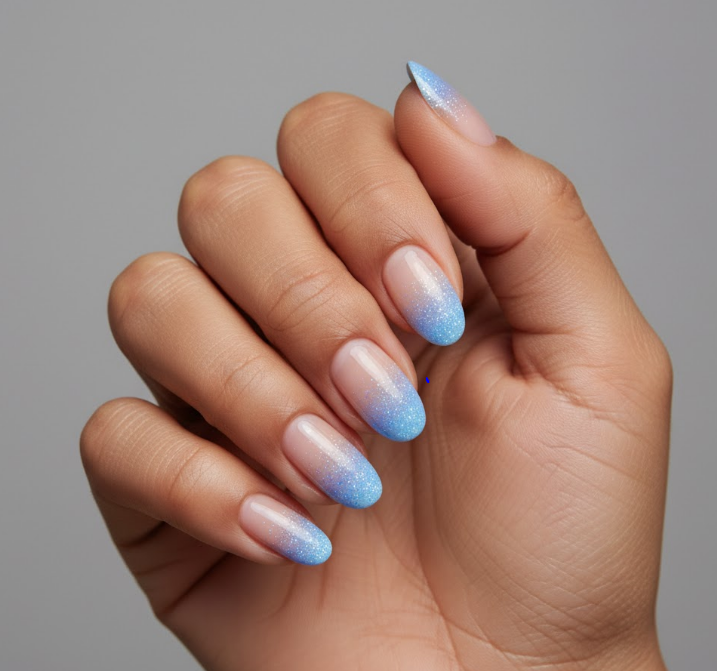
Imagine: The inverse of a French tip. A soft, hazy “aura” of blue glitter surrounds your cuticle, getting lighter as it moves down the nail bed. It’s an ethereal and modern look that feels fresh and fashion-forward.
- Pro Tip: “Use a small, fluffy brush (like a detail eyeshadow brush) to softly diffuse the glitter around the cuticle area. The goal is a soft glow, not a harsh line.”
15. The Glitter Liner Detail
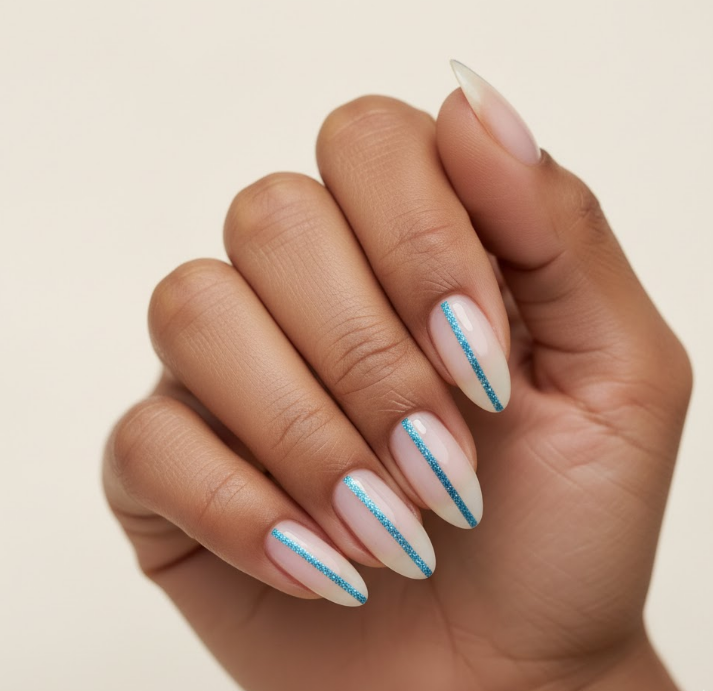
Imagine: A single, perfect stripe of blue glitter running down the center of a nude or cream-colored nail. It’s graphic, minimalist, and draws the eye in the most elegant way. Sometimes, a single line of sparkle is all you need.
- Pro Tip: “For a perfectly straight line, use a long, thin nail art brush or even a fine-tip liquid eyeliner brush. Practice the line on a piece of paper first to get a steady flow of polish.”
Your Blue Glitter Manicure Survival Guide
Making it Last: Glitter is notoriously hard to remove, which makes it ironically great for longevity. To make it last even longer, always start with a clean, dry nail wiped with alcohol to dehydrate the surface. A sticky base coat is non-negotiable for giving the glitter something to grip onto.
The Dreaded Removal: Don’t you dare just scrape! The foil method is your savior. Soak a cotton ball in acetone, place it on your nail, wrap your fingertip in tin foil, and wait 10-15 minutes. Gently push the softened polish off with an orange wood stick. Your nails will thank you.
The Final Word: Blue glitter isn’t just a trend; it’s a statement. It’s a splash of joy, a dose of confidence, and a celebration of individuality right at your fingertips. So, which of these designs has you ready to book your next salon appointment? Tell us in the comments, and don’t forget to tag us in your sparkling photos!